Search This Blog

Showing posts with label dessert/baked goods. Show all posts

Sunday, July 1, 2012

Nature's Bounty - Strawberries: Recipes


Summer fruit is terrific because it's so readily available - farmer's markets, the grocery store, "pick-your-own," etc.  It's easy to feel healthy when you can devour buckets of strawberries, blueberries, raspberries, peaches, plums, cherries, etc. 

The problem with all the fruit is ensuring you eat it all before it goes bad! I purchased 5 pounds of strawberries and then panicked - what on earth was I going to do with it all?  I could have made strawberry soup, but the kids wouldn't eat that...and I could have made jam or something else rather exotic but they wouldn't have eaten that either so I stuck with what works - strawberry ice cream and strawberry shortcakes.  Naturally we've been snacking on strawberries for the past few days and I froze a strawberry puree for the next time I want to make strawberry ice cream.  So for now, I think I'm covered!

The ice cream was out of this world - so creamy and soft. If you don't have an ice cream machine, then get one.  There is nothing like real homemade ice cream - especially when you know what ingredients have gone into the bowl.

The shortcakes were good - not a traditional shortcake. Instead, these were made with oatmeal and brown sugar so they had a very dense texture.  They were soft once I added the whipped cream and strawberries - and because they were dense at the start, they didn't fall apart easily, which I liked very much.  And as you might be able to tell, I really enjoy the flavor of cinnamon and sugar together.

Old-Fashioned Strawberry Ice Cream
2 cups heavy cream
3 cups fresh strawberries
1/4 cup 2% milk
1/3 cup granulated sugar

In a medium saucepan over medium-high heat, bring the cream to a near boil - do not allow it to actually boil.  Small bubbles will appear around the edges. Turn off the heat and add the sugar, stirring well.  Allow the mixture to cool and transfer to a large bowl.  In a blender, combine the strawberries and the milk until strawberries are pureed.  Cool for several hours or overnight in the fridge.  Add the mixture to your ice cream machine and follow the manufacturers' instructions. Once it's finishing mixing, it is ready to serve but will be very creamy and fluffy.  If you prefer it frozen, freeze in a freezer proof container for at least two hours.


Strawberry Shortcakes
Makes 6

2 cups all-purpose flour
1/2 cup old fashioned oats
1/2 cup packed dark brown sugar
1 tablespoon baking powder
1/2 teaspoon salt
1/2 teaspoon cinnamon
1 stick butter, cold, cut into small pieces
2/3 cup 2% milk

2 teaspoons cinnamon-sugar (50%-50% split)

2 1/2 cups fresh strawberries, sliced
2 tablespoons sugar

1 cup chilled heavy cream
3 tablespoons powdered sugar

Preheat oven to 425 degrees. Line a cookie sheet with parchment paper.

Mix together oats, flour, sugar, baking powder, salt and cinnamon. Add the butter and with your fingers, rub butter into the mixture between index and thumb to allow it to become course meal.  Add milk and stir well.  Drop an even amount of dough onto the baking sheet - 2 in a row, spread about 2" apart. Sprinkle with cinnamon-sugar.  Bake about 20 minutes, transfer to a rack and cool.  Slice in half - horizontally.

Combine the strawberries and the sugar together in a small bowl and allow it to sit at room temperature for about 10 minutes, mix well.

Using a hand mixer, beat the heavy cream and powdered sugar for about 3-5 minutes or until the cream hardens into whipped cream, with heavy peaks.

Spoon the cream onto the bottom of the sliced cake and top with berries.  Place the cake top on and sprinkle with powdered sugar.


Good Morning, Muffin!: Recipe


It's amazing how the simple act of baking breakfast muffins can turn the least hungry person into a complete animal - who will stuff his face as though he's never eaten before. Homemade blueberry muffins with cinnamon? Oh, I don't think I need to explain much more...delicious! Be sure to serve them warm.

Blueberry Crumb Muffins
makes 12

3/4 stick (6 tablespoons) unsalted butter, melted
1 cup packed dark brown sugar
1/2 cup 2% milk
1 large egg
1 1/2 cup all-purpose flour
1 1/2 teaspoon baking powder
1 teaspoon cinnamon
1/2 teaspoon salt
1 1/2 cup fresh blueberries

Topping
1/2 cup dark brown sugar
1/2 cup flour
1/2 teaspoon cinnamon
3 tablespoons unsalted butter, melted

Preheat oven to 350 degrees.  Line a 12-hole muffin pan with paper or foil muffin liners. In a large bowl whisk together the sugar, milk, egg, and butter.  Next mix in the flour. baking powder, cinnamon and salt and then gently fold in the blueberries.  Divide the batter evenly between the muffin cups.

In a small bowl mix the topping - first combine the sugar, flour and cinnamon together and add in the melted butter.  Using your hands, mix thoroughly so they mixture becomes moist and forms clumps.  Sprinkle the clumps on top of each muffin.

Bake in the middle of the oven for about 25 minutes. Cool on a wire rack.  Serve warm - not piping hot.

Wednesday, June 27, 2012

Peaches and Cream!: Recipe


The smell of fresh, ripened, peaches makes me feel like summer should last forever.  For years I didn't even like peaches but I loved the smell of them - as a kid I'd stick my nose on top of a ripened peach and just inhale. Mmmmm...I can still smell it now.

I made a cobbler with peaches and an assortment of frozen berries with an oatmeal-brown sugar crumb topping and served it with homemade peach-ginger snap ice cream. The ice cream was amazing - in fact, I brought it to my in-laws' house and they don't usually like to keep sweets in the house after everyone leaves a party but this...they wanted to keep!  And I didn't blame them; except now I need to make another batch for us!

The cobbler was served warm and the topping was buttery and slightly hard which made it feel like a real crust.  Together they were a perfect match and both were a cinch to make.  I know how attractive fruit desserts are but remember, the summer is a time for easy-does-it, so think of this the next time you want a pie and have to roll-out dough!

Peach Berry Cobbler
serves 8

4 large white peaches, cut in half, pitted and cut into 1" wedges
2/3 cup sugar, separated
1 1/4 cup all-purpose flour, separated
2 tablespoons peach nectar
1 cup frozen mixed berries
1/3 cup light brown sugar, packed
1/4 teaspoon kosher salt
8 tablespoons cold unsalted butter, cut into small pieces
1/2 cup quick-cooking oats

Preheat oven to 350 degrees.

In a large bowl, combine the sliced peaches with 1/3 cup granulated sugar, 1/4 cup flour, the peach nectar and toss well to coat.  Add the frozen berries and toss lightly. Pour into a 9" pie baking dish.

For the topping, place the remaining 1 cup of flour, the remaining 1/3 cup granulated sugar, the brown sugar and the salt in a food processor and pulse a few times to combine. Add the butter and pulse until the butter is the size of peas.  Pour the mixture into a bowl and add the oats. Work with your hands until it forms large clumps.  Spread evenly over the top of the pie dish and bake for about 40 minutes. Serve warm or at room temperature.


Peach-Ginger Snap Ice Cream
1 1/2 cups heavy cream
1/3 cup sugar
2 large, ripe white peaches, peeled and pitted
1/4 cup peach nectar
1/4 teaspoon vanilla extract
2/3 cup crushed ginger snap cookies

Heat the cream in a heavy medium saucepan over medium heat until small bubbles appear around the edges. Do not allow cream to boil. Remove from heat and add the sugar and stir well until it's completely dissolved.  Cool to room temperature.

Cut the peaches into small pieces and place in a food processor with the nectar. Blend until the peaches are pureed. Stire the puree and the vanilla into the cooled cream. Cover and refrigerate overnight.  Freeze in 1 or 2 batches in your ice cream machine according to the manufacturer's instructions. Just before it's complete, add in the cookies and mix another 2-3 minutes. Transfer to a freezable container and freeze 1-2 hours, at least.

Sunday, April 8, 2012

Perfect for Passover: Recipe

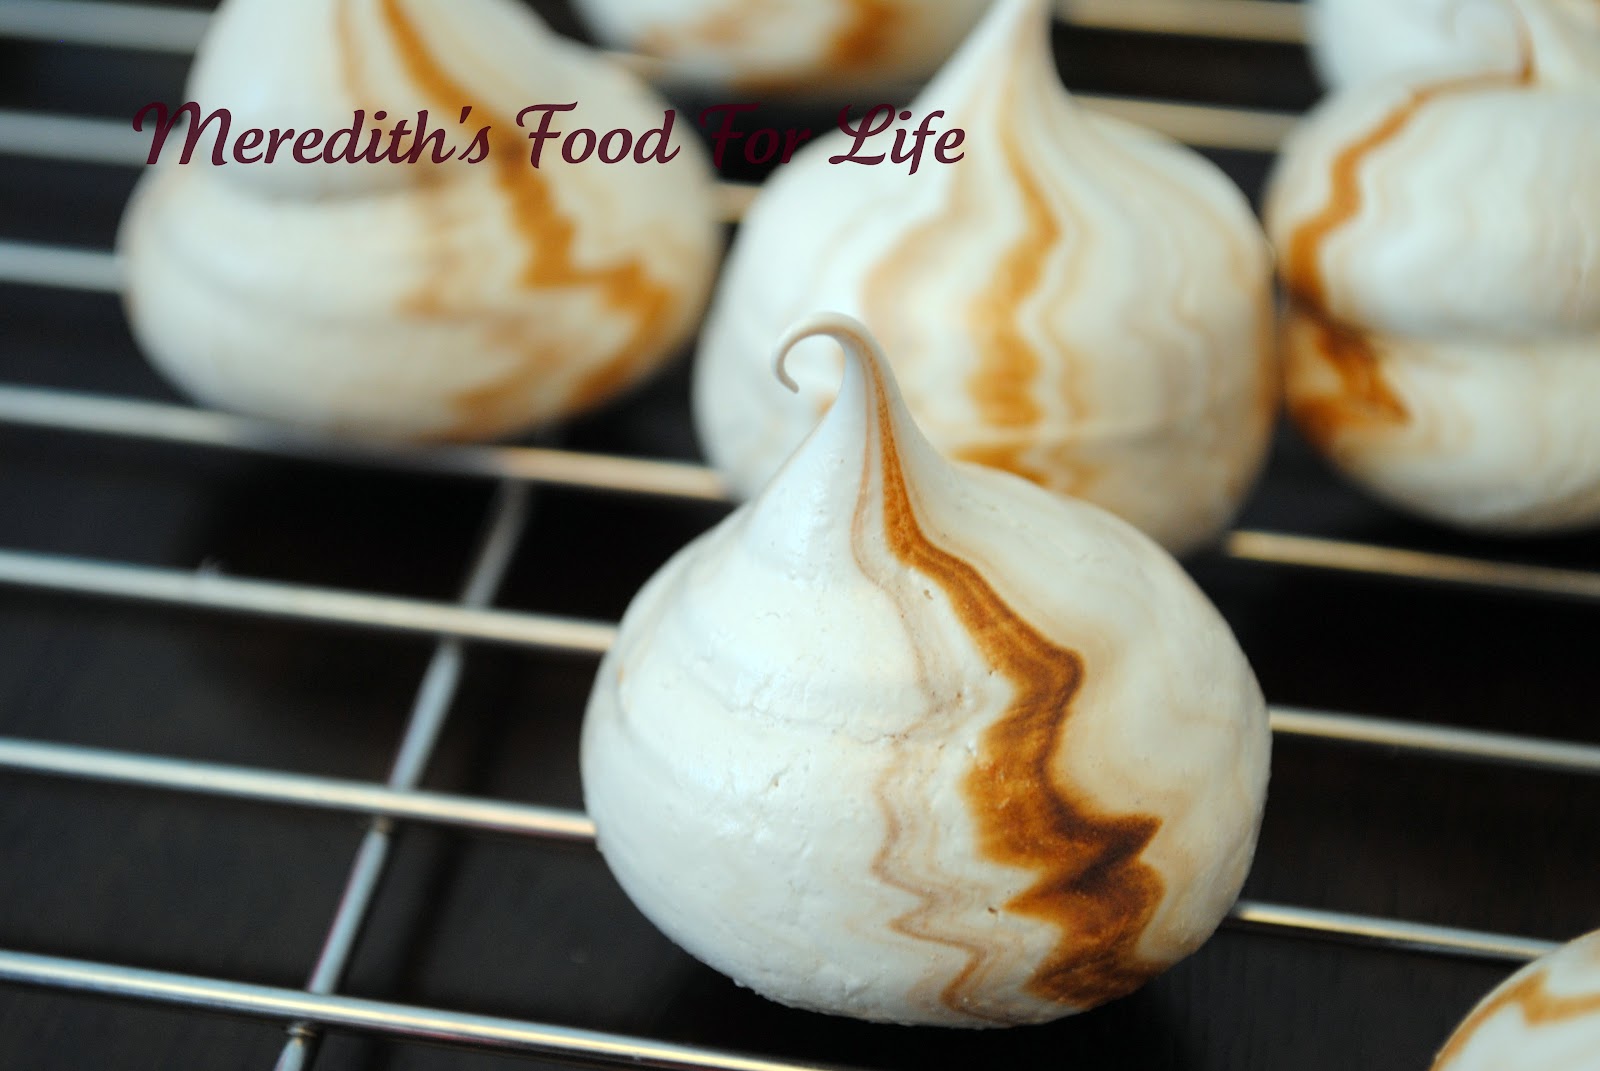
You can't have just any dessert on Passover. Naturally it must be flourless for it to pass muster, which makes creating something delicious a bit more challenging. And if you keep Kosher, well then that adds in a whole other dimension.

Regardless, you want to be flour-free so here is a perfect dessert for Passover - one that simply melts in your mouth. Well, at least that was the comment I heard around the dinner table last night! (Phew!). These couldn't have been any easier to make - and I had never made meringue before, to be honest.  So this was a breeze. The recipe I altered called for peppermint extract and red coloring - perfect for the winter holidays but not really right for spring.

Coconut Meringue Kisses
Makes @ 40

3 large egg whites, room temperature
1/8 teaspoon salt
1/3 cup sugar
1/2 cup powdered sugar
1/4 teaspoon coconut extract
8-10 drops brown food coloring

special equipment: pastry bag and 1/2" tip (can use bag without the tip, if needed); parchment paper

Preheat oven to 200. Line two cookie sheets with parchment paper and set aside. Next, prepare the pastry bag with the tip by sliding the tip into the bag and carefully snipping off just enough of the end so the pointed end of the tip peaks through completely. If you don't have a piping tip, you can snip off about 1/2 inch off the end of the bag and simply use that.

In a large, dry, clean bowl of a large mixer, whip whites on medium-high for about 1 minute before adding in the salt. Mix with the salt another 2 minutes before adding in the sugar in 2 additions beating about 2-3 minutes between each addition.  Next add in the powdered sugar, slowly, in another 2 additions - again beating about 2 minutes between each addition. Finally add in the extract and whip another 3 minutes until whites are very stiff. Using a wooden toothpick, dot the coloring in various spots all over the egg whites - do not stir.

Next, scoop as much of the whites as you can into the pastry bag and pipe about 1" round mounds about 1" apart from one another. Bake about 2 1/2 hours and then allow to cool another hour.  These can be made ahead of time - about two days - but store at room temp in an airtight container. If you have to stack them, use parchment paper between layers.

Sunday, March 4, 2012

A Family Affair: Recipe

My son has a school-wide event coming up celebrating the concept of  "Multi-Cultural" connections. Since my kids have both Eastern-European (Jewish) heritage and Italian heritage, I thought I'd send in a representative sampling from each side. From his Jewish roots, I'll be sending in mandelbreit from my Aunt Miriam's recipe (think Jewish "biscotti").  They're amazing with chocolate chips, a hint of almond, and dusted with cinnamon-sugar.  My son loves them so that was an easy decision to make.

Next, I needed to make something representing the Italian side and thought canoli might be too hard to send given the need to keep them cold. Then I thought of these cookies because I knew I could make them now and freeze them - easing the burden the night before they're due.  So off I went to find my mother's receipe for Rainbow Cookies from among my things.  I sent my husband off to fetch 8 oz of almond paste (he had to buy two 7 oz. packages since they only came that way and he knew I needed 8 oz - cost @ $12). Then I went out and purchased three 9x13 brownie pans since I didn't seem to have even one - I used a coupon and a gift card but it still cost me another $20. By this time, my husband informed me that the ones in the grocery store bakery sold for $3.99/lb and looked pretty damn good.  Ah well, I couldn't possibly purchase them if I could make them!

I asked my mom to drop over to help me since I had a feeling it would be a labor intensive project and my seven-year old daughter begged to help.  So together, we accomplished the task of making three separate layers of batter (even had to untangle the critical missing information in the recipe!)

My mother left once the layers were in the oven and my husband fell asleep shortly thereafter leaving me to a quiet kitchen where I assembled the layers. This morning I melted the chocolate and completed the recipe and finally when I cut them my husband (the Italian side of the family) gave me a very perplexed look...clearly I did not know my Italian flag (or that the cookies were supposed to mirror the flag) because the layers were in the wrong order! Ah well, still they looked good and tasted awesome! Funny, because I never liked these cookies - all this time I thought they were "icky" (an obvious hold-over from childhood) but when I had one this morning, I was hooked - they're delicious!

C'est la vie! (woops, there I go again!)

Neapolitan Cookies
makes 4 dozen

8 oz. almond paste, crumbled
4 eggs, seperated
2 cups all-purpose flour
1 cup sugar
1 cup (2 sticks) butter
2 Tbsp. red and green food coloring
1/2 cup apricot preserves
1/2 cup seedless red raspberry jelly
8 oz. semi-sweet chocolate chips

special equipment: parchment paper and three 9x13 brownie pans

Preheat oven to 350. Butter each pan and line with parchment paper - so that there is some paper hanging over the sides (will use this to lift the paper out of the pan when they're finished baking). Next butter the parchment paper lined pan.

In a large electric mixing bowl beat together the almond paste, butter and sugar until pale - about 5 minutes (be sure to stop and scrape down the sides occasionally). Next add in the egg yolks one at a time and beat until each one is well mixed - do not over beat. Next add in the flour and mix until evenly distributed.

In a seperate bowl, using clean and dry beaters (for a hand mixer) or whip attachment, whip the whites until stiff peaks form - about 4 minutes. Gently fold the whites into the other bowl.

Seperate the batter equally into three bowls and add red coloring to one bowl and green to the other - mix each well. Spoon the red batter into one pan, the plain batter into another pan and the green batter into the remaining pan. Bake all three about 14 minutes or until edges are slightly browned and tops are springy.

Cool all three layers on cooling rack about 5 minutes then lift the layers - using the parchment paper - out of the pans and onto the cooling rack. Slowly slide a large spatula under each layer and glide them off the paper and onto the racks. Cool about 20 minutes.

Using a large cookie sheet as the staging area, slide the green layer onto the sheet and spread the apricot preserves across the entire top - all the way to the outer edges. Next slide the yellow layer on top of the green one and spread the raspberry jelly on top of that one - again, all the way to the edges - and top with the red layer. Cover with plastic wrap and place a very large and very heavy book on top of the entire creation - leave overnight.

In the morning, melt the chocolate (I used the microwave and set it for 15 second intervals and mixed the chocolate after each time), remove the book and the plastic wrap and spread on the top of the red layer. Refrigerate - uncovered - for about 1/2 hour and then slice into about 48 pieces.

These can be made ahead of time and frozen - wrap well before freezing - and thaw at room temperature about an hour before eating.

Thursday, January 12, 2012

Sweets in a Hurry: Recipe

I looked for something sweet to eat after lunch yesterday and there were few choices in my pantry. I knew then that as soon as the kids came home from school they, too, would look for a sweet snack - and likely complain about the lack of choices. But I didn't do anything about it...until about 4 p.m., when we were all together doing homework. It was at that (very) inopportune moment that I decided to make Oatmeal Chocolate Chip Cookies to fill the void in the cabinet!

These are delicious - the smell of cinnamon wafting through the house as they cook is enough to turn anyone into a zombie making a bee line toward the oven! They are soft and sweet - just what we were all in search of!

Oatmeal Chocolate Chip Cookies
makes about 3 dozen

1/2 cup + 6 tablespoons of butter, softened
3/4 cup brown sugar, packed
1/2 cup granulated sugar
2 eggs
1 teaspoon vanilla
1 teaspoon cinnamon
1 1/2 cup all purpose flour
1 teaspoon baking soda
3 cups old fashioned Oats
1 cup chocolate chips

Preheat oven to 350.

Combine flour, cinnamon and baking soda in a bowl.  Cream together butter and sugars in the bowl of an electric mixer until light and creamy. Add  the eggs - one at a time - and mix well between each one. Next, add the vanilla and mix. Add in the flour mixture and mix well. Then add in the oats and chocolate chips and combine well.

Drop dough by rounded tablespoons onto ungreased cookie sheets and bake 11-12 minutes or until lightly browned. Cool on the pan for 1 minute and then on wire racks till cooled completely.

Saturday, January 7, 2012

Worth a Try: Food Chatter - Sour Cream Cake with Pecan Brittle

Pouring through an old issue of Bon Appetit magazine, as I often do, I saw a photo of a gorgeous cake that looked truly delicious. It's called:  Sour Cream Layer Cake with Pecan Brittle.  I wanted to make it right then but realized I didn't have a box of cake mix so the magazine page stayed open for a few days on the kitchen counter. Finally, today, I decided to give it a whirl. I wanted to see if this cake was as good as it looked - and guess what?  IT IS!!!

This is a "must try" recipe.  It was so easy - probably the hardest thing to do was scrape the sides of the pot while the sugar was caramelizing for the brittle.  Other than that it was incredibly easy and yielded an unbelievably moist and delicious cake. The flecks of chocolate you see throughout the cake make it slightly sophisticated and the icing made me speechless. The frosting tastes like one of those Canadian Maple Sugar candies that come in packs of four and in shapes like that of a maple leaf. I was willing to eat the frosting on its own!


check it out for your next party:
Sour Cream Layer Cake with Pecan Brittle

Tuesday, January 3, 2012

A Little Tea and Cake: Recipe

It's cold outside! I mean REALLY cold! I needed a little tea and cake to warm up today so I made Madeleines. What are they?  You know - those little sponge-like vanilla cakes in the shape of a modified Fleur de Lis? I just happened to have the Madeleine pan needed for just such a project! But if you don't have the right pan, try making these in a mini cupcake pan - it's the flavor you're after, after all.

I made these in a cooking class I took a long time ago and I wrote several notes on the recipe.  The one that stands out is that they start to go stale the moment you take them out of the oven! But since they're so very easy to make, I suggest you make a batch and then gobble them right down with your hot tea, a good book, and quite possibly a blanket!

Vanilla Buerre Noisette Madeleines
makes @ 60

3 large eggs
5 1/2 oz. all-purpose flour
5 1/2 oz. unsalted butter
1 vanilla bean
5 1/2 oz. sugar
1 tsp. baking powder
1/4 cup Creme de Cocao (or Rum)
Confectioner's Sugar for dusting

Preheat oven to 350.

In a medium pan, melt the butter over medium-high heat and scrape the vanilla bean* into the pan. When the butter becomes a nutty brown color, turn off the heat.  Spray the Madeleine pan with non-stick spray and set aside.


Meanwhile, using the whip attachment to your electric mixer, mix the eggs and sugar together until pale yellow and thick - about 2 1/2 minutes. With the whip, scrape the sides of the bowl to ensure it's fully mixed. Combine the flour and the baking powder together in a small bowl and using the whip as a spatula (machine not in use), gently fold the flour mix into the eggs. Then, gently stir in the butter. - be sure to scrape the bottom of the pan to get all the vanilla beans.


Spoon the mixture into a plastic piping bag fit with a #2 or #3 Wilton tip. Pipe into each opening on the tray a small mound of batter. Bake for about 15 minutes and then repeat to complete the batter.

While the cakes are baking, soak a clean dish towel with the alcohol and set aside.  Once the cakes come out of the oven, turn out onto the dish towel and cover lightly as they cool. Once fully cooled, dust with powdered sugar and repeat with remaining cakes.

* Slice the vanilla bean down its center - lengthwise - and with the tip of the knife, scrape the tiny black beans away from the skin.

Monday, January 2, 2012

New Year's Day + One: Recipe

I'm not sure why I feel this way but I love to have a hearty chili on New Year's Day.  Maybe it's becauase it's usually so cold and chili warms you up or maybe it's some tradition I heard about a long time ago but the New Year doesn't feel complete without a bowl of hot-spicy chili. However, this year I didn't get it together right and made, instead, a light Lemon Chicken with rice and a salad on New Year's Day.  Likely I made this "mistake" because it was nearly 50 degrees outside on New Year's Day...not exactly the "hunker-down" weather I described above!

So, on January 2nd, with temperatures down into the 20s, I made chili.  But what goes well with chili for dessert? Brownies, of course!

I made a batch of brownies but in my head they weren't intended for kids. Instead, they were made for a more sophisticated pallet - and one that could stand a bit of heat.  These came out even better than I thought they would - and I was really thrilled.  I've seen tons of trendy chocolate flavors and often wonder how one gets those in the kitchen - well...voila! I did it!  These have a very subtle undertone of cinnamon and spice and you don't even realize it until you've swallowed the whole thing.  The "heat" kicks up a bit in the back of the throat - but only slightly.  I served them with some vanilla/espresso ice cream and they were amazing.

Cinnamon-Spice Chocolate Brownies
makes 16

3/4 cup all-purpose flour
1/4 teaspoon baking soda
3/4 cup sugar
1/3 cup unsalted butter
1 teaspoon ground cinnamon
1/4 teaspoon Cayenne pepper
1 Tablespoon water
1 Tablespoon red wine
12 oz. semi-sweet chocolate chips
1 teaspoon vanilla extract
2 large eggs

Preheat oven to 325 degrees and spray an 8" square pan with non-stick spray.

In a small bowl, mix together the flour, baking soda,  cinnamon and pepper.  In a small saucepan, combine the sugar, butter, water and wine and allow it to boil over medium-high heat. Remove from heat, immediately and add 1 cup of chocolate. Stir consistently until it's smooth and melted.  Next transfer the chocolate ingredients to a medium-large bowl and stir well until cooled.  Whisk in 1 egg and beat well. Gradually add in 1/2 of the flour mixture and mix well. Add in the remaining egg and beat well and repeat with the remaining half of the dry ingredients. Be sure all ingredients are mixed well and stir in the remainder of the chocolate chips.

Pour into prepared pan and bake 45 minutes or until tester comes out clean. Cool completely before cutting into squares.

Sunday, January 1, 2012

May the Force Be With You: Food Musings

My nearly-six year old son has been bitten by the Star Wars bug. And really, who can blame him?  The classic movies (Episodes IV, V and VI) are truly that - classic.  And the new ones: I, II, and III are addictive. So this holiday break was filled with Star Wars movies, characters, conversations, and...you guessed it: food.

Williams-Sonoma (http://www.williams-sonoma.com/) was having a special on two of the cookie cutter sets and my husband purchased the last set for me (maybe it was really for my son...not sure).  So we have four space transporters, a Wookie, a Jawa, Yoda, Darth Vader, a Storm Trooper, Bobba Fett, R2-D2 and C3P-O.  We made traditional sugar cookies and royal icing and got to work.  The kids loved stamping out the shapes and icing them. They're adorable and somehow I see making tons of these in my future when birthday time rolls around!

Until then: May the Force Be With You!

Wednesday, November 23, 2011

A Little Carried Away

It's hard to be a food fan this time of year when you truly enjoy making something for others - if you've been advised to "lay-low." I'm almost to my due date for baby #3 so I know I need to take it easy. Easier said than done!

We always go somewhere else for Thanksgiving - it's never been "my" holiday...but I typically bake something.  This year would be no different, naturally.  But my mother emphatically begged me not to do anything too strenuous - and I swore I'd listen. Well?  Maybe that's why moms and daughters have issues...we daughters don't listen, do we?

So today I made these adorable cookies - two dozen of them - along with a pecan pie, a pumpkin pie, a pumpkin cheesecake and a batch of my peanut-butter-chocolate "kisses." I admit that I am BEYOND exhausted now but I'm pleased that the kids thought these little Nutcrackers were fantastic.  I couldn't help but buy the cutter, given my daughter's first performance in the show is just next week.

Have a wonderful Thanksgiving all...a safe and healthy holiday filled with much love!

Enjoy any of these recipes -
Pumpkin Cheesecake

Pecan Pie

Peanut Butter Kisses

Pumpkin Pie Cupcakes

Be sure to search the blog - there are additional recipes that would be perfectly for your Thanksgiving menu!

* http://www.fancyflours.com/ for the Nutcracker Cookie Cutter and decoration inspiration

Sunday, October 30, 2011

Egg McMuffin Inspired: Recipe

Pregnancy has never given me traditional cravings - nothing weird like peanut butter and pickles or ice cream and cucumbers. I sort of feel cheated by that! However, I do get the desire to cook and create and to find something new so maybe that in itself is a craving? Ahh, who knows!

What I do know is that this morning I work up wanting bacon and eggs but the simple dish just wouldn't do - I eat an egg and toast nearly every morning for breakfast - so this morning had to be something different. With all the talk of scones over the past two days, I decided to make bacon and cheddar scone-like-biscuits and have my eggs alongside - kind of like something you would grab in a fast food chain. These were flaky and buttery - and they were terrific.It made me laugh when my husband said, "all you need is to slice it open and put an egg on it - then it would be just like an Egg McMuffin!"  To be honest, I am still unsure as to whether that's a compliment or a dig. But who cares, right?  They were good!

Cheddar and Bacon Biscuits
makes about 12

5 slices bacon
3 cups all purpose flour
1 tablespoon sugar
1 Tablespoon baking powder
1 1/2 tsp. salt
1 stick unsalted cold butter cut into small pieces
6 oz. sharp shredded cheddar cheese
1 cup heavy cream + 2 Tablespoons

Preheat oven to 400 degrees and prepare a baking sheet with parchment paper.

Prepare 5 pieces of bacon as you normally would (I make them in the microwave to cut down on the grease and prep time). Cool and crumble.

In a large bowl, mix together the flour, salt, sugar, baking powder. Next add in the butter and with your hands crumble each piece until it resembles coarse meal. Add in the cheese and the bacon and mix well. Next add in the heavy cream and stir all together with your hands - forming a large ball.  Turn out onto a lightly floured surface and push together till it comes together.  Separate into two large pieces and cut each piece into 6 smaller wedges.  Place onto the baking sheet and brush each with the remaining heavy cream.

Bake for about 22 minutes - until lightly browned on top.  Cool on a wire rack slightly but serve warm.

Saturday, October 29, 2011

Pumpkin Scones: Recipe

This summer I heard about a national pumpkin shortage and the only thing I was concerned with was whether or not Libby's would have an adequate supply in my supermarket of 100% pure pumpkin in the 15 oz can come October!  I imagine that others cared about whether or not there would be pumpkins for the annual 'pick-your-own' festivals...but I was thinking about pies, breads, and scones. So what did I do?  I purchased about 8 32-oz cans of pure pumpkin and another 10 15-oz cans.  Truthfully, pumpkin like this doesn't go bad - and certainly not within a year!  However, I'm now hoarding it all - so now if you notice there isn't any pumpkin on the shelves...I might be the one to blame!

I love pumpkin scones and I've never made them before so I searched all over for the right scone recipe  to use as a base.  Typically scones are served with jam so they aren't designed to be ultra sweet - I suppose that if we wanted a sweet cake, we'd order a cupcake. Pumpkin seems to favor the flavors of its namesake pie - cinnamon, nutmeg, ginger, etc. So I crafted this recipe based on two or three others I reviewed.

These happened to have been cakey and rather good without the icing but once the icing went on...they were perfect.

Pumpkin Spiced Scones with Two-Toned Icing
makes about 12 small-medium scones

3 cups all-purpose flour
1/3 cup granulated sugar
2 Tablespoons brown sugar
1 Tablespoon baking powder
1/2 tsp. salt
1 Tablespoon ground cinnamon
1/2 tsp. ground nutmeg
1/4 tsp. ground ginger
1/4 tsp. ground cloves
1/8 tsp. ground all-spice
7.5 oz. canned pure pumpkin (about 1/2 a 15 oz. can)
6 Tablespoons cold butter, cut into small pieces
3 Tablespoons buttermilk
1 large egg

For the White Glaze
1 cup powdered sugar
2 Tablespoons milk

For the Spiced Glaze
1 1/4 cup powdered sugar
2 Tablespoons milk
1 tsp. cinnamon
pinch of nutmeg, ginger, ground cloves and all-spice

Preheat oven to 425 and line a baking sheet with parchment paper.

Combine the flour, sugars, salt, cinnamon, nutmeg, cloves, ginger and all-spice in a large bowl. Use a fork and mix well.  Next add the butter and with your fingers, rub the butter into the flour mixture until it's crumbly and there are no more chunks of butter.

In a separate bowl, whisk together the pumpkin, buttermilk and egg.  Fold the wet ingredients into the dry ones and for a dough ball.  Onto a floured surface, turn out the dough ball and flatten into a long rectangle about 1-inch thick. Use a large knife and make three horizontal cuts about equidistant. Next, cut an "x" into each of the three sections so that each section then has 4 pieces of dough.  Place each on the prepared baking sheet and bake about 15 minutes. Cool on a wire rack.

Once scones are cooled, make the two icings.  First place the white icing mixture into a bowl and mix well. With a butter knife or a pastry brush, spread the plain white icing over the scone.

Finally, prepare the spiced icing and drizzle over each scone.  Allow them to set and harden - about an hour or so (though they can certainly be eaten before that!)

Friday, October 28, 2011

It's Black, It's White!: Recipe

I was home earlier than usual from work and needed a project to calm my brain after a very looooong week...what better than a baking project with the kids? These cookies are a throw back from my own childhood - images of diner-brunches or bakery-runs with my father.

My two kids helped me with these and it was a lot of fun to do together - I think they enjoyed it because they could conceptualize the outcome!  I've just finished eating one and to be honest, they are really delicious.  Mind you, I don't really like chocolate so I always eat the chocolate side first so I can savor the vanilla half.

You know, some things are really great to remember and then there are some things that are great to remember AND recreate.

Oh, I also made my favorite pumpkin bread - and since I purchased 15 cans of pure pumpkin in the last 2 weeks, I figured I'd better start using it! Spiced Pumpkin Bread

Enjoy the black and whites...

Black and White Cookies
makes about 10 cookies

For Cookies -
1 1/4 cup all purpose flour
1/2 tsp. baking soda
1/2 tsp. salt
1/3 cup well-shaken buttermilk
1/2 tsp. vanilla
1/3 cup (5 1/3 Tablespoons) unsalted butter, softened
1/2 cup sugar
1 large egg

For Icing
1 1/2 cup confectioner's sugar
1 tablespoon light corn syrup
1 tsp. fresh lemon juice
1/4 tsp. vanilla
2 Tablespoon water
1/4 cup unsweetened Dutch-process cocoa powder

Preheat oven to 350.

Whisk together flour, baking soda, and salt in a bowl.  Stir together the buttermilk and vanilla in a cup.

Beat together butter and sugar in a large electric mixer bowl until pale and fluffy - about 3 minutes. Then add in the egg, scrape sides of the bowl, and mix again for another minute. Mix in flour and buttermilk in alternate turns - starting and ending with the flour. Mix until smooth - about 1 1/2 minutes.

Using an ice cream scoop, spoon out 10 scoops of batter about 2" apart onto a cookie sheet fitted with parchment paper. Bake in the middle of the oven about 15-17 minutes. Remove and allow cookies to completely cool - about 1/2 hour to an hour.

In a medium bowl stir the confectioner's sugar together with the corn syrup, lemon juice, vanilla, and 1 Tablespoon of water until glassy and smooth - you may need a bit more water - add by tiny teaspoons and mix very well before adding anymore.  Icing should be smooth and of medium thickness - if it's too runny, add more sugar.

Put half the icing into another bowl and add in less than the 1/4 cup of cocoa and again mix well and add water, as needed.  Chocolate icing should be the same consistency as the white - glassy and of medium thickness.

With a small spatula, coat the flat sides of the cookie in one half white and allow to dry slightly before coating the other side in the chocolate icing.  Drying time - about 1 hour. They can be eaten well before that!

Sunday, October 9, 2011

Ginger-Woman: Recipe

Today is the third time in three weeks that I have made Gingerbread Cookies. The first time I made them, they were so good that the four of us devoured them quickly.  My kids loved them - surprisingly - because the ginger lends a "spicy" touch to the cookies. They aren't for everyone.  The second time I made them I siphoned off half the batch and brought them to a friend's house for an impromptu dinner party. One friend remarked at how much she loved them and recalled her mother making tons of things with molasses, which conjured up a clear nostalgic feeling. That pleased me, for sure! So today I made a third batch - all of which are being brought to my friend's home for a planned dinner party (the same friend with the molasses memories).  I hope she likes them!

This is simple - very simple. The hardest part would be finding the right ingredients but you know me, by now...I'm one of those people that prides herself on having the right ingredients - for everything, no matter what it might be. But you can find the crystallized ginger in any speciality store or in the fruit and vegetable section of most grocery stores.

Enjoy!

Gingerbread Cookies
Makes @ 24

2 1/4 cup all purpose flour
1 tsp. baking soda
2 tsp. ground cinnamon
1 1/2 tsp. ground cloves
1/2 tsp. ground nutmeg
1/2 tsp. ground ginger
1/4 tsp. salt
1 cup dark brown sugar
1/4 cup vegetable oil
1/3 cup unsulfured molasses
1 egg
1/3 cup crystallized ginger, finely chopped
granulated sugar

Preheat oven to 350 and line 2 baking pans with parchment paper.

In a large bowl, mix flour, baking soda, cinnamon, cloves, nutmeg, ginger, salt and mix well. In the bowl of an electric mixer, beat the brown sugar with the oil and molasses on medium for about 5 minutes.  Scrape down the sides and add the egg. Beat for a minute and then scrape again and beat one more minute.  With mixer on low, add in the dry ingredients and mix on medium speed for 2 minutes. Add ginger and mix again.

In a small bowl place 1/2 cup of sugar.  Scoop the dough with your hands - about the size of an egg - roll it into a ball and then lightly flatten it. Press each side with the sugar and place on the sheets. Repeat and bake all for about 13 minutes or until cookies are crackled on the top and soft inside. Cool.

Sunday, October 2, 2011

BOO!: Recipe

I am full of pathetic excuses as to why I've not blogged since February...but who really likes to hear excuses? Not me! Oh sure, we renovated our kitchen which took 3 months to complete (well, "complete" is subjective, isn't it? we're still not fully detailed...), and we're waiting to be joined in December by another little person - so really, I have been cooking up something...but so what, right? I've baked, I've cooked, I've been in the kitchen all these months. But I've not been motivated to tell you about it. But as the guilt piles higher than a triple decker sandwich you order in a diner, I realized it was time to post.  So while this is certainly not the most amazing thing I've ever made, it was today's episode in the kitchen.  The level of culinary activity has certainly ebbed over the past few weeks - I guess they call that "nesting." Alas, the family has been happy with the results!

So what can be better than a cupcake with buttercream frosting? How about one that combines buttercream with sinfully rich chocolate ganache? My thoughts, exactly!

Cupcakes with Chocolate Ganache and Buttercream

Vanilla Cupcake and buttercream recipe
cupcakes and buttercream

Chocolate Ganache
7 oz. 70% cocoa chocolate, coarsely chopped
1/2 cup heavy cream

chop the chocolate as well as you can and place in a large glass bowl. Heat heavy cream to a boil and pour over the chocolate. Mix constantly until all chocolate has melted and allow mixture to sit in a cool spot for about 20-30 minutes to thicken - or until it is spreading consistency.  Spread evenly over tops of cupcakes.

Pipe buttercream over the edges of the cupcake.

Monday, February 14, 2011

Dinner for the Loves of My Life: Recipe


Valentine's Day is here. I'm not sure why it seems to be such a lovely day - it is just an ordinary day and you are supposed to express your love daily for those you care for most. But, alas, it's February 14th and the birds were chirping, the sun was shining, and it was a glorious 58 degrees - a welcomed treat after what has seemed an endless barrage of nasty winter weather.  Ahh, love is the air - indeed!

Our "Romantic (with the kids in tow) Dinner" Menu
Asian Flavored Flank Steak
Sweet Potato
Sesame Jasmine Rice Timbale
Giant (and Mini) Vanilla Cupcakes

I marinaded the flank steak for two days and it was delicious! Don't overcook the steak though - it can be tough, if done so. I love this combination with the slight hint of sesame oil infused into the sticky rice.

Asian Flavored Flank Steak
2 lbs. flank steak, scored on the back and front
3 scallions, washed and cut in half
3 garlic gloves, peeled
2/3 cup Soy Sauce
1/4 cup light brown sugar
2 Tablespoons Dijon Mustard
1/2 cup fresh cilantro, washed and drained

Combine last 6 ingredients in a food processor and pour over the steak. Cover and refrigerate at least overnight - but up to 72 hours.

Set oven on broil and broil meat for 7 minutes on the first side and 4 minutes on the second. Be sure to allow it to rest for about 5 minutes before carving. Slice thin and serve with extra juice that pools.

Sesame-Jasmine Rice Timbale
1 cup jasmine rice
2 cups water
1 teaspoon dark sesame oil
1 tablespoon each, white and black sesame seeds
1 large scallion, sliced - green parts only
2 tablespoons butter, divided
1 1/2 tablespoons Olive oil
4 Half-cup ceramic ramekins

In a large pot, bring 2 cups of water to a boil and add rice, 1 tablespoon of butter and sesame oil, mix well. Cover and simmer for about 15-20 minutes. Uncover and fluff rice - add the seeds and the scallion and remaining tablespoon of butter and mix well. Cover again, turn off heat, and allow rice to settle for 3-5 minutes.

Meanwhile, grease each of four ramekins with olive oil. Spoon - and pack - rice into the ramekins (fill completely). Turn ramekins over onto the plates and allow them to sit for 30 seconds before removing the bowl.

Sunday, February 13, 2011

Valentine's Day Treats: Recipe and Musings


I don't know about you, but I love - let me repeat: LOVE - sweets. However, if we're being honest, then I should tell you that I've never been much of a "chocolate" person (and I'm using quotes around chocolate to emphasize the traditional methods we're served chocolate; i.e., chocolate ice cream, chocolate bars, kisses, etc.). I don't really enjoy chocolate ice cream, though in a pinch and with absolutely nothing left to have, I've been known to indulge.  But given the choice, I wouldn't usually select things like Hershey's kisses, or Milky Way bars or really any other bar unless I am desperate for something sweet and I have no other options to satisfy the sweet tooth.

That said, I do like dark, dark, chocolate and I especially like it mixed with interesting items like Earl Grey tea, mint, or fire roasted chili peppers - that kind of chocolate is intriguing and really satisfies the taste buds.

I don't know what Valentine's Day would be complete without sweets, really...so I made up a few to please my husband and my children. The truffle recipes are below and are very simple to make.  The white chocolate one is a real favorite in this house and seems to delight others everytime I make them.  The chocolate lollipops are probably the easiest thing in the world to do: simply melt chocolate discs and then pour them into molds and freeze for a short time. Can't get much easier than that!

The round pink and purple lollipops are called Cake Pops. For Christmas I was given this amazing book with unbelievable photos called "Cake Pops."  The recipes and ideas are unreal - things like pandas, sheep, robots all on pop-sticks! This was the first time I made these so naturally I followed the directions purely. There seem to be a few tricks to master before trying the more daring recipes but I'm game.  In the meantime: these have an out-of-this-world taste (how could they not? They're made from a boxed cake mix and combined with prepared frosting, rolled into balls then dipped into melting chocolate). They are awesome!  Can't wait to make them again and try an adorable face, etc.

Happy Valentine's Day, My Sweet!

White Chocolate-Pecan Truffles
makes 18 small truffles

2 Tablespoons heavy cream
3 oz. fine-quality white chocolate, chopped fine
1 teaspoon unsalted butter, softened
2 teaspoons Kahlua
2/3 cup pecans, lightly toasted and chopped fine

In a small saucepan, bring cream to a boil. Remove from pan and add in the chocolate and stir well until smooth and melted completely.  Add the butter, stirring well, and then add in the Kahlua and 1/4 cup of pecans. Mix well. Pour mixture into a glass bowl, cover and refrigerate overnight or at least 4 hours. Form mixture into little balls by using a teaspoon. Roll the balls into the remaining nuts and re-chill at least an hour.  Keep in an airtight container covered - will last about 5 days.


Chocolate-Espresso Crunch Truffles
makes 18 small truffles


2 Tablespoons heavy cream
3 oz. fine-quality bittersweet chocolate, chopped fine
1 teaspoon unsalted butter, softened
2 teaspoons prepared instant espresso
2/3 cup Graham Crackers, chopped fine
In a small saucepan, bring cream to a boil. Remove from pan and add in the chocolate and stir well until smooth and melted completely. Add the butter, stirring well, and then add in the espresso and 1/4 cup of crackers. Mix well. Pour mixture into a glass bowl, cover and refrigerate overnight or at least 4 hours. Form mixture into little balls by using a teaspoon. Roll the balls into the remaining Graham Cracker crumbs and re-chill at least an hour. Keep in an airtight container covered - will last about 5 days.

Thursday, February 10, 2011

Just Bakin' Around: Food Musings


Here's a quick post of my homemade Snow Globe cookies made with royal frosting and edible glitter.  The second photos is that of a traditional Bouche de Noel - complete with sugar critters and marzipan mushrooms dipped in cocoa! The frosting is chocolate buttercream and the inside is a soft vanilla buttercake filled with mocha flavored whipped cream. Ahhh, I see visions of my childhood with that...my mother made this cake every year from the time I was 6 until I was 12 years old and my oh my did I love it!

Finally, I baked up an old fashioned Pound Cake the other night - I had some left over strawberries and whipped cream that needed a proper home so I thought this would be fun to make.  The kids are always so good - they ask "what is that yummy smell?" as they run around the house - stopping just long enough to give me a big kiss and beg for some batter or cake!  Pound Cake is wonderful - simple, moist, and sweet. Next, I'll add some vanilla bean to it and see how that changes things.

Wednesday, January 12, 2011

Caramel-Chocolate Mini Tartlets: Recipe

Let me start off by saying we were the beneficiaries of Mother Nature's whimsy once again here in New York. So with buckets of time on my hands, I did what I enjoy and seem to do well - fiddle around in my kitchen. With more than 8 inches on the ground I was not planning to go anywhere today so I happily tried to find a new baked item to become tonight's dessert. I poured over multiple books but still could not find something I wanted to make, or even adapt, until finally I stumbled over a photo in a cooking magazine. The recipe called for hazelnuts and while I have about 2/3 cup of them on hand (I swear you would be shocked at the strange things I have in the cabinet!), the recipe asked for a full cup - ah-ha! perfect opportunity to change it up.

Wanting the kids to enjoy it, I was even more determined to eliminate the nuts (I had fleetingly imagined substituting the filberts with pecans but then I'd be assured neither child would touch it and I would be left eating these things for days - not part of any diet, mind you).

So the issue is now that I've made so much caramel, I need to make vanilla ice cream just to have something upon which to pour it! (One mustn't waste food in today's day!) Mind you, the caramel will hold for about a week in the refrigerator - just reheat.

Caramel- Chocolate Mini Tartlets
Makes about 30

Crusts
1 1/2 cup all purpose flour
2 tablespoons sugar
1/4 teaspoon salt
1/2 cup (1 stick) chilled unsalted butter, cut into small dice
5 tablespoons cold whipping cream
1 teaspoon vanilla extract

1/2 cup Graham cracker crumbs

Caramel Filling
1 1/3 cup packed golden brown sugar
7 tablespoons unsalted butter
6 tablespoons light corn syrup
2 tablespoons water
1/2 teaspoons salt
6 tablespoons whipping cream

1/2 cup dark chocolate chips

For Crusts: Butter 30 metal mini muffin cups. Blend flour, sugar and salt in processor. Add butter and blend using on/off turns until mixture resembles course crumbs. Add the 5 tablespoons cream and vanilla and blend again just until mixture begins to clump together. Press 2 teaspoonfuls of dough evenly into the bottom and sides of each mini cup. Pierce crusts all over with fork.

Preheat oven to 350 degrees and freeze the tartlets for 30 minutes before baking. Bake the crusts until golden - about 25 minutes. Cool crusts in the tins for about 10 minutes and then carefully loosen crusts and cool completely on a baking sheet. Place about 1/2 teaspoon of Graham cracker crumbs into the bottom of each tartlet.

Next combine brown sugar, butter, corn syrup, salt and water in a saucepan and bring to a bowl. Allow mixture to boil for 2 minutes (mixture will thicken up and bubble rapidly). Do not stir while boiling. Remove from heat and add cream; stir till smooth. Pour caramel into a heat proof measuring cup and allow it to cool for about 10 minutes. Carefully pour mixture into each tartlet cup till it nearly reaches the top. Place 2 chips on top of each tartlet and refrigerate for about an hour.

These can be made ahead of time and placed in the fridge but allow them to come to room temp for about an hour before serving.