Making changes to an old stand-by can run the risk of being too radical but if it's done right, it can be a smash. However, like everything else, "smash" is purely subjective. I saw a Ming Tsai recipe for "Asian Sloppy Joes" and I was quickly drawn in. I followed the basics but make significant enough changes that I'm confident this is my recipe, now...And, we all laughed when my oldest came out with the perfect name - The Sloppy Dog.
Ming's recipe called for only a pork and beef mixture - I added in veal. He suggested using celery, and red onions only - I used a red bell pepper, and half a red onion and half a yellow onion, instead. His recipe used far more heat than this one and instead of iceberg lettuce, I used arugula and added freshly cubed avocado. And for the kicker: hot dog rolls, instead of hamburger buns. The kids got a kick out of it and the littlest one ate hers deconstructed - she consumed the sloppy dog mixture and the roll separately. This was a great meal! The Ming Tsai Hoisin-Lime Sauce was really delicious and added that perfect tang to the meat. This is one we'll eat again and again!
Sloppy Dogs
makes 8-10
2 tablespoons olive oil
1/2 red onion, minced
1/2 yellow onion, minced
1 large red bell pepper, finely chopped
1 tablespoon finely chopped jalapeno
1 lb. meat mixture: ground veal, ground beef and ground pork
1/2 lb. plum tomatoes coarsely chopped
1 1/4 cup Hoisin-Lime Sauce* (recipe to follow)
1/3 cup fresh cilantro, chopped
8-10 hot dog buns, top sliced
1 large ripe avocado
1 large handful fresh arugula, washed and dried
In a large sauce pan, heat the oil over medium-high heat. Add the onion, pepper and jalapeno and mix well - saute till soft, about 5-7 minutes. Next add in the tomatoes and saute again - another 5 minutes, stirring often. Add in the cilantro and the meats. Cook the meat till browned, break up large pieces with the back of a wooden spoon - about 6-7 minutes. Add in the sauce and raise the heat to high - bring the mixture to a boil, stir often, and allow it to thicken so it is no longer soupy - about 20-25 minutes. Take off the heat.
Line the rolls with arugula, top with meat mixture and then sprinkle with avocado.
Ming Tsai's Hoisin-Lime Sauce
makes about 2 cups
1/2 cup plus 2 tablespoons canola oil
2 large garlic cloves, minced
1 tablespoon fresh ginger, minced
2 cups hoisin sauce
1/2 cup fresh lime juice
Heat 2 tablespoons of oil in a medium saucepan until hot; add in the ginger and the garlic and saute over medium-high heat for about one-two minutes. Add the hoisin sauce and stir about one minute. Add in the mine juice, mix well, and allow to come together for about one more minute.
Transfer the mixture to a food processor and blend, drizzling in the 1/2 cup of oil. Cool well before refrigerating (can be stored for up to two weeks).
Food is so amazing; it is so often the focus of our lives - whether it's a celebration or a simple meal, food can bring together friends and families while nourishing the body and soul. I love food and I love to eat so it occurred to me that I could share this love with you. Bon Appetit!
Search This Blog
Showing posts with label Party Menu. Show all posts
Monday, May 20, 2013
New Twist on a Classic: Recipe
Labels:
Beef,
meats,
Party Menu,
pork,
Recipe,
Sauces,
Someone Else's Food,
veal
Sunday, April 14, 2013
More Peas Please!: Recipe
I know I've done something right if my husband, who doesn't like peas, announces: "This is pretty good!" In this month's issue of Bon Appetit I saw a recipe for a Pea Mash on Toast. It looked so lovely - and since I like peas, I thought I'd give it a whirl. I took away some of the ingredients they suggested and I added my own. I liked it; it was refreshing and very quick to make for a hungry group. I always have a bag of frozen petite peas in the house because my kids love "Pasta with Peas and Ham" so I make that regularly. Try this the next time you're looking to crack open a bottle of wine and relax while you watch the kids play in the backyard.
Petite Pea Spread on Toast
1 loaf of French Bread, sliced into 1 1/2" slices, toasted
2 cups frozen petite peas
3 tablespoons Pecorino Romano Cheese
2 tablespoons olive oil
juice of one lemon
5 chives - about 6" long
1 large garlic clove, smashed
2 tsp. salt
1/4 cup parsley
1/2 cup water
Thaw the peas under hot running water for about 3 minutes. Meanwhile, bring the water, lemon juice, salt, garlic clove, parsley and 1 tablespoon of oil to a boil. Add in the peas and cook about 3 minutes. Strain out the liquid and reserve. Place the ingredients, along with remaining oil, cheese, and chives in a food processor and puree until thick but uniformly smashed. Add in about 2 tablespoons of the liquid and puree until smoother. Repeat once more. Serve on toasted bread.
Petite Pea Spread on Toast
1 loaf of French Bread, sliced into 1 1/2" slices, toasted
2 cups frozen petite peas
3 tablespoons Pecorino Romano Cheese
2 tablespoons olive oil
juice of one lemon
5 chives - about 6" long
1 large garlic clove, smashed
2 tsp. salt
1/4 cup parsley
1/2 cup water
Thaw the peas under hot running water for about 3 minutes. Meanwhile, bring the water, lemon juice, salt, garlic clove, parsley and 1 tablespoon of oil to a boil. Add in the peas and cook about 3 minutes. Strain out the liquid and reserve. Place the ingredients, along with remaining oil, cheese, and chives in a food processor and puree until thick but uniformly smashed. Add in about 2 tablespoons of the liquid and puree until smoother. Repeat once more. Serve on toasted bread.
Labels:
little Bites,
No-Meat,
Party Menu,
Recipe
Saturday, March 10, 2012
Holiday Time: Food Musings
Ahhh, tonight we spring-ahead the clocks - a tell-tale sign that spring is upon us. With the promise of spring comes Passover and Easter.
I find the best way to host a dinner with a calm outlook is to prepare. I plan my menu, ensure I am able to cook everything in the oven at the times I need to, draft a shopping list as well as a 'to-do' list and I even plan out the serving platters I plan to use for each dish. So then, I offer you the following few items purely as inspiration for your holiday dinner table -
Feel free to check out all the recipes on Meredith's Food for Life for continued inspiration!
Ideas for Easter
Starters -
Lasagna Roll-Ups (can be made and frozen ahead of time)
Deconstructed Greek Salad
Main Course -
Drunken Lamb
Pecan Crusted Rack of Lamb
Pesto Crusted Rack of Lamb with Mango
Desserts -
Devil's Food Cake with Chocolate Buttercream
Coconut Raspberry Cake with Almonds
Raspberry and Grand Mariner Tiramisu
Ideas for Passover -
Almond and Chocolate Cupcakes
Roman-Jewish Fried Artichokes
Cherry Tomato Salad with Lemon Poppy Dressing
I find the best way to host a dinner with a calm outlook is to prepare. I plan my menu, ensure I am able to cook everything in the oven at the times I need to, draft a shopping list as well as a 'to-do' list and I even plan out the serving platters I plan to use for each dish. So then, I offer you the following few items purely as inspiration for your holiday dinner table -
Feel free to check out all the recipes on Meredith's Food for Life for continued inspiration!
Ideas for Easter
Starters -
Lasagna Roll-Ups (can be made and frozen ahead of time)
Deconstructed Greek Salad
Main Course -
Drunken Lamb
Pecan Crusted Rack of Lamb
Pesto Crusted Rack of Lamb with Mango
Desserts -
Devil's Food Cake with Chocolate Buttercream
Coconut Raspberry Cake with Almonds
Raspberry and Grand Mariner Tiramisu
Ideas for Passover -
Almond and Chocolate Cupcakes
Roman-Jewish Fried Artichokes
Cherry Tomato Salad with Lemon Poppy Dressing
Sunday, October 9, 2011
Ginger-Woman: Recipe
Today is the third time in three weeks that I have made Gingerbread Cookies. The first time I made them, they were so good that the four of us devoured them quickly. My kids loved them - surprisingly - because the ginger lends a "spicy" touch to the cookies. They aren't for everyone. The second time I made them I siphoned off half the batch and brought them to a friend's house for an impromptu dinner party. One friend remarked at how much she loved them and recalled her mother making tons of things with molasses, which conjured up a clear nostalgic feeling. That pleased me, for sure! So today I made a third batch - all of which are being brought to my friend's home for a planned dinner party (the same friend with the molasses memories). I hope she likes them!
This is simple - very simple. The hardest part would be finding the right ingredients but you know me, by now...I'm one of those people that prides herself on having the right ingredients - for everything, no matter what it might be. But you can find the crystallized ginger in any speciality store or in the fruit and vegetable section of most grocery stores.
Enjoy!
Gingerbread Cookies
Makes @ 24
2 1/4 cup all purpose flour
1 tsp. baking soda
2 tsp. ground cinnamon
1 1/2 tsp. ground cloves
1/2 tsp. ground nutmeg
1/2 tsp. ground ginger
1/4 tsp. salt
1 cup dark brown sugar
1/4 cup vegetable oil
1/3 cup unsulfured molasses
1 egg
1/3 cup crystallized ginger, finely chopped
granulated sugar
Preheat oven to 350 and line 2 baking pans with parchment paper.
In a large bowl, mix flour, baking soda, cinnamon, cloves, nutmeg, ginger, salt and mix well. In the bowl of an electric mixer, beat the brown sugar with the oil and molasses on medium for about 5 minutes. Scrape down the sides and add the egg. Beat for a minute and then scrape again and beat one more minute. With mixer on low, add in the dry ingredients and mix on medium speed for 2 minutes. Add ginger and mix again.
In a small bowl place 1/2 cup of sugar. Scoop the dough with your hands - about the size of an egg - roll it into a ball and then lightly flatten it. Press each side with the sugar and place on the sheets. Repeat and bake all for about 13 minutes or until cookies are crackled on the top and soft inside. Cool.
This is simple - very simple. The hardest part would be finding the right ingredients but you know me, by now...I'm one of those people that prides herself on having the right ingredients - for everything, no matter what it might be. But you can find the crystallized ginger in any speciality store or in the fruit and vegetable section of most grocery stores.
Enjoy!
Gingerbread Cookies
Makes @ 24
2 1/4 cup all purpose flour
1 tsp. baking soda
2 tsp. ground cinnamon
1 1/2 tsp. ground cloves
1/2 tsp. ground nutmeg
1/2 tsp. ground ginger
1/4 tsp. salt
1 cup dark brown sugar
1/4 cup vegetable oil
1/3 cup unsulfured molasses
1 egg
1/3 cup crystallized ginger, finely chopped
granulated sugar
Preheat oven to 350 and line 2 baking pans with parchment paper.
In a large bowl, mix flour, baking soda, cinnamon, cloves, nutmeg, ginger, salt and mix well. In the bowl of an electric mixer, beat the brown sugar with the oil and molasses on medium for about 5 minutes. Scrape down the sides and add the egg. Beat for a minute and then scrape again and beat one more minute. With mixer on low, add in the dry ingredients and mix on medium speed for 2 minutes. Add ginger and mix again.
In a small bowl place 1/2 cup of sugar. Scoop the dough with your hands - about the size of an egg - roll it into a ball and then lightly flatten it. Press each side with the sugar and place on the sheets. Repeat and bake all for about 13 minutes or until cookies are crackled on the top and soft inside. Cool.
Labels:
dessert/baked goods,
Party Menu,
Recipe
Sunday, February 13, 2011
Valentine's Day Treats: Recipe and Musings
I don't know about you, but I love - let me repeat: LOVE - sweets. However, if we're being honest, then I should tell you that I've never been much of a "chocolate" person (and I'm using quotes around chocolate to emphasize the traditional methods we're served chocolate; i.e., chocolate ice cream, chocolate bars, kisses, etc.). I don't really enjoy chocolate ice cream, though in a pinch and with absolutely nothing left to have, I've been known to indulge. But given the choice, I wouldn't usually select things like Hershey's kisses, or Milky Way bars or really any other bar unless I am desperate for something sweet and I have no other options to satisfy the sweet tooth.
That said, I do like dark, dark, chocolate and I especially like it mixed with interesting items like Earl Grey tea, mint, or fire roasted chili peppers - that kind of chocolate is intriguing and really satisfies the taste buds.
I don't know what Valentine's Day would be complete without sweets, really...so I made up a few to please my husband and my children. The truffle recipes are below and are very simple to make. The white chocolate one is a real favorite in this house and seems to delight others everytime I make them. The chocolate lollipops are probably the easiest thing in the world to do: simply melt chocolate discs and then pour them into molds and freeze for a short time. Can't get much easier than that!
The round pink and purple lollipops are called Cake Pops. For Christmas I was given this amazing book with unbelievable photos called "Cake Pops." The recipes and ideas are unreal - things like pandas, sheep, robots all on pop-sticks! This was the first time I made these so naturally I followed the directions purely. There seem to be a few tricks to master before trying the more daring recipes but I'm game. In the meantime: these have an out-of-this-world taste (how could they not? They're made from a boxed cake mix and combined with prepared frosting, rolled into balls then dipped into melting chocolate). They are awesome! Can't wait to make them again and try an adorable face, etc.
Happy Valentine's Day, My Sweet!
White Chocolate-Pecan Truffles
makes 18 small truffles
2 Tablespoons heavy cream
3 oz. fine-quality white chocolate, chopped fine
1 teaspoon unsalted butter, softened
2 teaspoons Kahlua
2/3 cup pecans, lightly toasted and chopped fine
In a small saucepan, bring cream to a boil. Remove from pan and add in the chocolate and stir well until smooth and melted completely. Add the butter, stirring well, and then add in the Kahlua and 1/4 cup of pecans. Mix well. Pour mixture into a glass bowl, cover and refrigerate overnight or at least 4 hours. Form mixture into little balls by using a teaspoon. Roll the balls into the remaining nuts and re-chill at least an hour. Keep in an airtight container covered - will last about 5 days.
Chocolate-Espresso Crunch Truffles
makes 18 small truffles
2 Tablespoons heavy cream
3 oz. fine-quality bittersweet chocolate, chopped fine
1 teaspoon unsalted butter, softened
2 teaspoons prepared instant espresso
2/3 cup Graham Crackers, chopped fine
In a small saucepan, bring cream to a boil. Remove from pan and add in the chocolate and stir well until smooth and melted completely. Add the butter, stirring well, and then add in the espresso and 1/4 cup of crackers. Mix well. Pour mixture into a glass bowl, cover and refrigerate overnight or at least 4 hours. Form mixture into little balls by using a teaspoon. Roll the balls into the remaining Graham Cracker crumbs and re-chill at least an hour. Keep in an airtight container covered - will last about 5 days.
Thursday, February 10, 2011
Little Bites: Recipe
What on earth could taste better than crispy Italian bacon?? I mean, really?? Well, yes...crispy Italian bacon with soft creamy goat cheese and fig jam? Absolutely!
I made this for a dinner party and they were gone before I could blink. I made the cups a few hours in advance so that they could cool and be easy to eat. What a fun little pop-em!
Crispy Pancetta Cups with Figs and Goat Cheese
makes 24 cups
24 slices of pancetta
6 oz. soft goat cheese
1/2 cup fig jam
6 oz. dried figs, each one cut into 6 little pieces
Pam Cooking Spray
2 12-hole mini muffin tins
Preheat oven to 450.
Spray all 24 muffin holes with cooking spray and place a slice of pancetta into each one so the edges are a bit flouted. Bake about 20 minutes or until edges look like they're about to begin to burn. Remove and let cool in the tins about 10 minutes. Remove and cool completely on wire racks.
Using a small spoon, line the bottoms of each cup with fig jam and add two pieces of dried figs to the cup. Top with a small spoonful of goat cheese. Serve.
Labels:
Holiday food,
little Bites,
meats,
Party Menu,
pork,
Recipe
Sunday, January 9, 2011
Company is Coming: recipes
When company comes - at the last minute - it's helpful to have a selection of menu items you can make using what's normally in the house. I wanted to add a homemade dessert to my dinner plate so I rummaged around a few books and magazines and came up with two new items. Both used ingredients I already had access to and both seemed simple enough to pull off quickly - before I put up the roast chicken.
Within an hour I was finished with the baking and just needed to ice the one cookie. Just the way I like it - quick and easy!
Lemon-Poppy Shortbread with Lemon Icing
Makes about 24
1 cup all-purpose flour
2 1/2 tablespoons cornstarch
1/4 teaspoon ground nutmeg
1 teaspoon poppy seeds
1/8 teaspoon salt
1/2 cup unsalted butter
1/3 cup sugar
1 tablespoon plus 1 teaspoon grated lemon peel
1 teaspoon vanilla extract
Preheat oven to 350.
Combine flour, cornstarch, nutmeg, salt and poppy seeds in medium bowl; mix. In an electric mixer, cream butter and sugar with lemon peel and vanilla in a large bowl until light and fluffy. Add dry ingredients and mix well until dough begins to come together.
Turn dough out onto a sheet of waxed paper and flatten into a disk. Cover with another sheet of paper. Roll out dough to 1/4" thickness, turning and freeing the paper as you go - both top and bottom. cut out cookies and transfer to ungreased cookie sheets. Gather and reroll scraps and cut out additional cookies.
Bake cookies till firm and beginning to brown on the edges - about 17 minutes. Transfer cookies to a rack and let cool. Drizzle with Lemon Icing (see below).
Lemon Icing
1/2 cup powdered sugar
3 tsp fresh lemon juice
Place sugar in a mixing bowl and whisk in the lemon juice until the mixture is thin enough to drip off a fork. Transfer to a squeeze bottle and drizzle over cookies.
Orange-Ginger Shortbread Cookies with Rich Chocolate Chips
Makes about 24
1 1/2 cups all purpose flour
1/2 teaspoon baking powder
1/2 teaspoon salt
1/2 cup unsalted butter, room temperature
1/2 cup sugar
1 teaspoon (packed) grated orange peel
1 teaspoon (packed) finely chopped crystallized ginger
1/2 teaspoon orange extract
1 large egg yolk
3 tablespoons whipping cream
8 oz. bittersweet (about 70% cacao) chocolate chips
Preheat oven to 350. Prepare baking sheets with sheet of parchment paper.
Combine flour, salt and baking powder in a medium bowl. In a large mixer, beat butter, sugar, orange peel ad extract until light and fluffy. Add in the yolk and then the cream and mix well. Add the flour mixture and beat until dough comes together and then add in the chocolate chips.
Drop by generous tablespoons onto the sheets spacing 3/4" apart. Flatten slightly and bake until golden - about 18-20 minutes. Transfer to a wire rack and cool.
Labels:
dessert/baked goods,
Party Menu,
Recipe
Sunday, November 28, 2010
Christmas Brunch: Food Chatter
I was recently asked by a follower for some ideas on what to make for a holiday brunch. After thinking about it for a few days, I realize that the answer brings infinite possibilities - it all depends on what you like! I've hosted brunch on New Year's Day for the past few years and the menu remains relatively static - I rotate a few items here and there but it's great to stick with what you know and like. Here are some thoughts on a brunch I've done before - New Year's Day Brunch I and New Year's Day Brunch II
The question I received was specific to Christmas Eve brunch and since the evening usually comes full of fish ideas followed by a Christmas Day filled with oodles of food, I would offer some of the following ideas:
* Brunch for a bunch is best served buffet style - let people take what they like
* Little bites are easy to manage with a plate and few seats
* Brunch is always a festive time so add fun drinks to the mix - like Prosecco with Cassis and single raspberry or champagne (or Prosecco) and orange juice
* Try to add items to the table that require little time day-of to prepare
to start with...
Zucchini Fritters
Goat Cheese and Olive Tapenade
Figs and Melon Wrapped Prosciutto
the main event...
Baked Stuffed Shrimp
Quiche with Pancetta, Arugula and Two Cheeses
Spinach Lasagna Roll-up
Roast Beef in Red Wine
Bibb Lettuce, Craisins, Walnuts and Apples
Honey Ginger Carrots
Orzo with Chive Butter
the end result...
Melon and Blueberry Crumble
Devil's Food Cake
Chocolate Covered Strawberries
The question I received was specific to Christmas Eve brunch and since the evening usually comes full of fish ideas followed by a Christmas Day filled with oodles of food, I would offer some of the following ideas:
* Brunch for a bunch is best served buffet style - let people take what they like
* Little bites are easy to manage with a plate and few seats
* Brunch is always a festive time so add fun drinks to the mix - like Prosecco with Cassis and single raspberry or champagne (or Prosecco) and orange juice
* Try to add items to the table that require little time day-of to prepare
to start with...
Zucchini Fritters
Goat Cheese and Olive Tapenade
Figs and Melon Wrapped Prosciutto
the main event...
Baked Stuffed Shrimp
Quiche with Pancetta, Arugula and Two Cheeses
Spinach Lasagna Roll-up
Roast Beef in Red Wine
Bibb Lettuce, Craisins, Walnuts and Apples
Honey Ginger Carrots
Orzo with Chive Butter
the end result...
Melon and Blueberry Crumble
Devil's Food Cake
Chocolate Covered Strawberries
Sunday, September 12, 2010
The "Big Night": Menu and Recipes
If you've never seen the movie "Big Night," my husband and I urge you to do so. Starring Stanley Tucci and Tony Shalub, it's a witty story set in the 1950s about two brothers that own an Italian restaurant. All they want to serve is authentic Italian fare but the locals only really understand spaghetti and meatballs - which drives Tony Shalub's character (the chef) crazy. As a result, their restaurant is starting to have real financial worries but they believe they're getting a second chance when they learn that Louis Prima is coming to eat there. So, as anyone would, they prepare a giant feast of Italian greats - including Timpano: a giant drum. It's a wonderful movie and after we saw it, I told my husband (who wasn't at the time) that I had to make that one time.
As the summer comes to an official close, we decided to gather our friends for an adults-only party. It was a terrific time and well worth the efforts taken over the past few days. It was our "Big Night!"
Here is the menu served -
Appetizers
* Pancetta and Rosemary Risotto Balls
* Wild Mushroom and Goat Cheese Crostini
* Bruschetta with Olive Tapenade
* Melon and Virginia Ham
* Zucchini Fritters
* Three-Meat Sliders with Asiago Cheese and Basil-Dijonaise
* Spinach Dip
* Olives
* Cheese
* Chips and Dip
Main Course
* Timpano
* Green Salad
* Tomato with Fresh Mozzarella and Basil
Dessert
* Mint Chocolate Chip - Snickerdoodle Ice Cream Sandwiches homemade ice cream
* Butterfinger Ice Cream homemade ice cream
* Chocolate Glazed Chocolate Tart
* Plum Clafouti
As the summer comes to an official close, we decided to gather our friends for an adults-only party. It was a terrific time and well worth the efforts taken over the past few days. It was our "Big Night!"
Here is the menu served -
Appetizers
* Pancetta and Rosemary Risotto Balls
* Wild Mushroom and Goat Cheese Crostini
* Bruschetta with Olive Tapenade
* Melon and Virginia Ham
* Zucchini Fritters
* Three-Meat Sliders with Asiago Cheese and Basil-Dijonaise
* Spinach Dip
* Olives
* Cheese
* Chips and Dip
Main Course
* Timpano
* Green Salad
* Tomato with Fresh Mozzarella and Basil
Dessert
* Mint Chocolate Chip - Snickerdoodle Ice Cream Sandwiches homemade ice cream
* Butterfinger Ice Cream homemade ice cream
* Chocolate Glazed Chocolate Tart
* Plum Clafouti
Labels:
dessert/baked goods,
little Bites,
meats,
Menu,
Party Menu,
Recipe,
Sides/Salads
Homemade Ice Creams: Recipe
People think making your own ice cream is novel and fancy - I think it's genius! A machine does all the work and I get all the credit!
I made the following two ice creams: mint chocolate chip and vanilla with crushed butterfingers for a party. They were both so delicious that I could have eaten them both all alone.
Use your ice cream maker - and if you don't have one: get one! They're really easy to use. I keep mine in the freezer at all times so I don't have to waste time waiting for the cylinder to freeze. I don't use it enough, but when I do, I am pleased with the result.
Mint Chocolate Chip Cookie Sandwiches
3 cups heavy cream
1/2 cup sugar
1 Tbsp. peppermint extract
1 cup chocolate chips
Large cookies
In a saucepan, bring cream to a near-boil (do not allow it to boil) - when little bubbles appear at the edges. Remove from heat and stir in the sugar. Cool to room temperature and add in the extract. Place mixture in a bowl and refrigerate overnight. Freeze in machine, according to directions, and just as it's about to be complete, add in the chips.
Freeze in a large freezable container - about 6 -8 hours. Place about 12 cookies on a cookie sheet lined with freezer paper. Spoon about 2 Tbsp of ice cream onto the cookies and top with additional cookies. Refreeze overnight.
Vanilla -Butterfinger Ice Cream
3 cups heavy cream
3/4 cup. plus 2 Tbsp. sugar
2 tsp. vanilla extract
6 mini butterfingers, crushed
In a saucepan, bring cream to a near-boil (do not allow it to boil) - when little bubbles appear at the edges. Remove from heat and stir in the sugar. Cool to room temperature and add in the extract. Place mixture in a bowl and refrigerate overnight. Freeze in machine, according to directions, and just as it's about to be complete, add in the candy.
I made the following two ice creams: mint chocolate chip and vanilla with crushed butterfingers for a party. They were both so delicious that I could have eaten them both all alone.
Use your ice cream maker - and if you don't have one: get one! They're really easy to use. I keep mine in the freezer at all times so I don't have to waste time waiting for the cylinder to freeze. I don't use it enough, but when I do, I am pleased with the result.
Mint Chocolate Chip Cookie Sandwiches
3 cups heavy cream
1/2 cup sugar
1 Tbsp. peppermint extract
1 cup chocolate chips
Large cookies
In a saucepan, bring cream to a near-boil (do not allow it to boil) - when little bubbles appear at the edges. Remove from heat and stir in the sugar. Cool to room temperature and add in the extract. Place mixture in a bowl and refrigerate overnight. Freeze in machine, according to directions, and just as it's about to be complete, add in the chips.
Freeze in a large freezable container - about 6 -8 hours. Place about 12 cookies on a cookie sheet lined with freezer paper. Spoon about 2 Tbsp of ice cream onto the cookies and top with additional cookies. Refreeze overnight.
Vanilla -Butterfinger Ice Cream
3 cups heavy cream
3/4 cup. plus 2 Tbsp. sugar
2 tsp. vanilla extract
6 mini butterfingers, crushed
In a saucepan, bring cream to a near-boil (do not allow it to boil) - when little bubbles appear at the edges. Remove from heat and stir in the sugar. Cool to room temperature and add in the extract. Place mixture in a bowl and refrigerate overnight. Freeze in machine, according to directions, and just as it's about to be complete, add in the candy.
Labels:
dessert/baked goods,
Holiday food,
Party Menu,
Recipe,
resources,
Sandwiches
Timpano: Food Chatter
In Italian, Timpano means: Big Drum. To me, it's a giant exercise in patience and prayer. This is not difficult to make - not at all. It's just time consuming and must be thought out well in advance. There is cooking and chopping and baking and cooling that has to be taken into account. But the result is so attractive and so pleasing. And when you cut into it, it's amazing to see that so much work went into one dish. It's no wonder that Tony Shalub (Big Night) was so passionate about his native food - who wants plain pasta and meatballs when it can be combined with salami, cheese, hard boiled eggs, homemade sauce, tiny meatballs and encrusted in a giant "bread."
I can't retype all the directions for this because there are trade secrets for the timpano! No, seriously, an entire book was made with the timpano as the basis. The book was co-written by Stanley Tucci's sister and I must say, it's a terrific guide. Many times I use the polpette recipe for simple dinner-fare. The kids and my husband simply love the meatballs so much that for my daughter's first birthday party I made these in the theme of "favorite foods." They're a perfect bite.
I made the eggs and the meat balls two days before assembling, the sauce one day before and I sliced up the salami and the cheese way ahead of time. Hours before I assembled this, I had to make the pasta (3 lbs of it!) and allow it to cool. Before making the dough, I shooed everyone out of the house: I needed complete and utter concentration.
Take solice in knowing that this is an undertaking that is fun, even though it's labor intensive. Maybe that's why people love to cook so much - it pleases people while tickling the senses.
Book: Cucina & Famiglia: Two Italian Families Share Their Stories, Recipes, and Traditions by Joan Tropiano Tucci and Gianna Scappin with Mimi Shanley Taft (forward by Stanley Tucci)
I can't retype all the directions for this because there are trade secrets for the timpano! No, seriously, an entire book was made with the timpano as the basis. The book was co-written by Stanley Tucci's sister and I must say, it's a terrific guide. Many times I use the polpette recipe for simple dinner-fare. The kids and my husband simply love the meatballs so much that for my daughter's first birthday party I made these in the theme of "favorite foods." They're a perfect bite.
I made the eggs and the meat balls two days before assembling, the sauce one day before and I sliced up the salami and the cheese way ahead of time. Hours before I assembled this, I had to make the pasta (3 lbs of it!) and allow it to cool. Before making the dough, I shooed everyone out of the house: I needed complete and utter concentration.
Take solice in knowing that this is an undertaking that is fun, even though it's labor intensive. Maybe that's why people love to cook so much - it pleases people while tickling the senses.
Book: Cucina & Famiglia: Two Italian Families Share Their Stories, Recipes, and Traditions by Joan Tropiano Tucci and Gianna Scappin with Mimi Shanley Taft (forward by Stanley Tucci)
Labels:
food musings,
great books,
Holiday food,
meats,
Party Menu,
resources,
Someone Else's Food
A Home Run Slider: Recipe
There is something about a mini burger on a mini bun that seems to delight even the most cranky. Who doesn't love tiny burgers? Of course, there is a whole subculture of people that love the White Castle burger (I'm not one of them...) so it only makes sense that these are a hit at a party.
These were a hit that our party - and I was very glad about that. They were simple to make and nearly all of the burgers were gone in a blink! I'm certain that if I had served these before the chips and dip, they would have been devoured.
Three-Meat Sliders with Asiago and Basil Dijonaise
makes about 35
1.75 lb. mixture of ground pork, beef and veal
2 medium shallots, minced
2 Tbsp. salt
1 tsp. dried oregano
1 egg
2/3 cup Hikory-Brown Sugar BBQ sauce
6 oz. Asiago cheese, sliced very thin and into about 1/2" squares
2 Tbsp. mayonaise
1/2 cup Dijon Mustard
1/3 cup fresh basil
35 mini "party rolls" (from Martins) or other mini slider rolls
* These were made the day before and stored in the refridgerator until ready to cook.
Combine meats, shallots, salt, oregano, and egg in a large bowl and mix very well - by hand, is best. Form very small balls, using a tablespoon to scoop out mixture. Gently flatten the ball with plam of your hand - do not make too flat. Place each onto a cooking sheet. Once all patties are made, brush each one with BBQ sauce - both sides. Cover well and refrigerate overnight.
In a food processor, combine mustart, mayonaise and basil until thick and all basil has been very finely chopped. Place in a bowl and refrigerate overnight.
Prepare barbecue and cook each patty about 4 minutes per side (with a very hot fire). Add the cheese and melt. While burgers are being cooked, spread the dijonaise onto the inside of each bun (one side only). Place burgers into the buns and serve!
These were a hit that our party - and I was very glad about that. They were simple to make and nearly all of the burgers were gone in a blink! I'm certain that if I had served these before the chips and dip, they would have been devoured.
Three-Meat Sliders with Asiago and Basil Dijonaise
makes about 35
1.75 lb. mixture of ground pork, beef and veal
2 medium shallots, minced
2 Tbsp. salt
1 tsp. dried oregano
1 egg
2/3 cup Hikory-Brown Sugar BBQ sauce
6 oz. Asiago cheese, sliced very thin and into about 1/2" squares
2 Tbsp. mayonaise
1/2 cup Dijon Mustard
1/3 cup fresh basil
35 mini "party rolls" (from Martins) or other mini slider rolls
* These were made the day before and stored in the refridgerator until ready to cook.
Combine meats, shallots, salt, oregano, and egg in a large bowl and mix very well - by hand, is best. Form very small balls, using a tablespoon to scoop out mixture. Gently flatten the ball with plam of your hand - do not make too flat. Place each onto a cooking sheet. Once all patties are made, brush each one with BBQ sauce - both sides. Cover well and refrigerate overnight.
In a food processor, combine mustart, mayonaise and basil until thick and all basil has been very finely chopped. Place in a bowl and refrigerate overnight.
Prepare barbecue and cook each patty about 4 minutes per side (with a very hot fire). Add the cheese and melt. While burgers are being cooked, spread the dijonaise onto the inside of each bun (one side only). Place burgers into the buns and serve!
Labels:
Beef,
little Bites,
meats,
Party Menu,
pork,
Recipe,
Sandwiches,
veal
The Great Zucchini: Recipe
Ever see that Charlie Brown episode with the giant pumpkin? Well picture a giant zucchini...got it in your head? Ok...a young woman in my office came to work the other day with this giant vegetable and claimed she didn't want it - it was too big for one person. Knowing I was having a party, I figured I could use it somehow. Sure enough, turns out that one can make zucchini look a lot like a potato as in potato-latkas. So, voila!
Would you believe that this 4 lb. zucchini only made about 35 pancakes? Truth be told, I didn't utilize the entire thing - I sliced off each end (about 1/2 pound gone from there) and I didn't shred the skin. Also, I had to remove some flesh because the larger this thing grew the more it behaved like a gourd - complete with pumpkin-like seeds and a stringy inside.
These were terrific with a slightly sweeter taste than its potato cousin. I should have served them with a sour cream dipping sauce but by the time I figured that, they were all gone!
Zucchini Fritters
makes about 35 small
5 cups shredded zucchini (use large holes on a box grater), from about 3 1/2 lbs zucchini, squeezed tightly of all liquid*
1/3 cup flour
1 Tbsp. salt
2 eggs, beaten
1 onion, minced
* Use hands to squeeze out liquid and then squeeze again with paper towels
Combine all ingredients and heat oil in a large frying pan until very, very hot. Using a tablespoon to scoop up mixture, form about 35 small balls and then flatten gently into pancakes. To ensure even cooking, do not overcrowd the fryer - place about 4-6 pancakes into the fryer at one time. Turn gently after about 4-5 minutes per side - once it browns on each side. Remove and drain on paper bags
I made these one day ahead and refrigerated. Reheat in an oven set at 350 for 15 minutes.
Would you believe that this 4 lb. zucchini only made about 35 pancakes? Truth be told, I didn't utilize the entire thing - I sliced off each end (about 1/2 pound gone from there) and I didn't shred the skin. Also, I had to remove some flesh because the larger this thing grew the more it behaved like a gourd - complete with pumpkin-like seeds and a stringy inside.
These were terrific with a slightly sweeter taste than its potato cousin. I should have served them with a sour cream dipping sauce but by the time I figured that, they were all gone!
Zucchini Fritters
makes about 35 small
5 cups shredded zucchini (use large holes on a box grater), from about 3 1/2 lbs zucchini, squeezed tightly of all liquid*
1/3 cup flour
1 Tbsp. salt
2 eggs, beaten
1 onion, minced
* Use hands to squeeze out liquid and then squeeze again with paper towels
Combine all ingredients and heat oil in a large frying pan until very, very hot. Using a tablespoon to scoop up mixture, form about 35 small balls and then flatten gently into pancakes. To ensure even cooking, do not overcrowd the fryer - place about 4-6 pancakes into the fryer at one time. Turn gently after about 4-5 minutes per side - once it browns on each side. Remove and drain on paper bags
I made these one day ahead and refrigerated. Reheat in an oven set at 350 for 15 minutes.
Labels:
Holiday food,
little Bites,
No-Meat,
Party Menu,
Recipe
AKA: Rice Balls: Recipe
Making rice balls is a fine art. My mother-in-law makes them at the holidays and they're terrific with peas and ground meat. I wanted to give them a try and I always love mini versions of things so I thought these pop-ems would be a good addition to a party menu. Turns out they were hit! Of course, the key to risotto is the consistent stirring. So if my recipe doesn't make it clear: STIR!
Pancetta-Rosemary Risotto Balls
makes about 100
4 oz. pancetta, cut into tiny cubes
5 Tbsp. unsalted butter + 1 Tbsp.
1 tsp. Olive Oil
1 onion, minced
16 oz. Aborrio Risotto
8 oz. chicken stock
(2) 14 1/2 oz. cans chicken broth
1 Tbsp. + 1 tsp. Fresh Rosemary
6 oz. Fontina Cheese, shredded
1/2 cup vermouth
1/4 cup warm water
2-3 cups Italian Breadcrumbs
Vegetable Oil for frying
In a large heavy pot (I use my 6 qt. Le Cruset), heat 5 Tbsp. butter and olive oil together until it's foamy. Add the onion and saute over medium heat until onions lose their shape and begin to soften. Add the Pancetta and saute another 6 minutes. Stir several times to avoid browning. Add 1 Tbsp. rosemary and saute another minute.
Meanwhile, pour stock and broth into a saucepan and warm over medium-low heat, next to the risotto pot.
Raise the heat on the risotto to high, stirring contents often. Add the rice to the pot and stir several times to coat the rice with the butter-pancetta; about 1 minute. Just as the rice begins to stick to the bottom of the pot, add 2 ladles of broth to the pot. Stir well, several times, and then lower the heat to medium and let the liquid simmer. Do not allow the rice to stick to the pot - stir more often than you think is necessary. As the rice expands with moisture and gets softer and larger, the need to stir will lessen - some. But for now, be sure to stir rigorously. Continue to add ladles of liquid and stir until the rice expands and the mixture becomes thick and harder to stir.
After about 30 minutes, add in the vermouth and stir well. Next add in the warm water and stir well. The entire cooking time should be about 1 hour. Near the end, as the rice is almost done (you'll need to taste it to know), add in the remaining tsp. of rosemary and the remaining tablespoon of butter. Next add in the shredded cheese and stir like mad! The cheese would be the final step - once you add in the cheese, you should remove the risotto from the heat and stir many times to ensure the cheese is evenly distributed and the begins to cool.
Place one half of the mixture into a large bowl and stir each half of the risotto occasionally to speed the cooling process. Allow the mixture to cool completely - about 3-5 hours.
Once completely cooled and congealed, roll about 1 1/2 inch balls and place onto a large baking sheet. Refrigerate the balls for about 3 hours. Fill a very deep fryer (I used my wok) with about 6" of cooking oil and heat over high heat until extremely hot - about 5 minutes before ready. Roll each ball in breadcrumb and working in batches, carefully drop about 6 balls into the fryer at one time. Using a slotted spoon, remove balls after about 30-60 seconds and drain on paper bags. Repeat until all balls are complete.
I made these 1 day before needed and reheated in an oven set at 350 for 15 minutes.
Pancetta-Rosemary Risotto Balls
makes about 100
4 oz. pancetta, cut into tiny cubes
5 Tbsp. unsalted butter + 1 Tbsp.
1 tsp. Olive Oil
1 onion, minced
16 oz. Aborrio Risotto
8 oz. chicken stock
(2) 14 1/2 oz. cans chicken broth
1 Tbsp. + 1 tsp. Fresh Rosemary
6 oz. Fontina Cheese, shredded
1/2 cup vermouth
1/4 cup warm water
2-3 cups Italian Breadcrumbs
Vegetable Oil for frying
In a large heavy pot (I use my 6 qt. Le Cruset), heat 5 Tbsp. butter and olive oil together until it's foamy. Add the onion and saute over medium heat until onions lose their shape and begin to soften. Add the Pancetta and saute another 6 minutes. Stir several times to avoid browning. Add 1 Tbsp. rosemary and saute another minute.
Meanwhile, pour stock and broth into a saucepan and warm over medium-low heat, next to the risotto pot.
Raise the heat on the risotto to high, stirring contents often. Add the rice to the pot and stir several times to coat the rice with the butter-pancetta; about 1 minute. Just as the rice begins to stick to the bottom of the pot, add 2 ladles of broth to the pot. Stir well, several times, and then lower the heat to medium and let the liquid simmer. Do not allow the rice to stick to the pot - stir more often than you think is necessary. As the rice expands with moisture and gets softer and larger, the need to stir will lessen - some. But for now, be sure to stir rigorously. Continue to add ladles of liquid and stir until the rice expands and the mixture becomes thick and harder to stir.
After about 30 minutes, add in the vermouth and stir well. Next add in the warm water and stir well. The entire cooking time should be about 1 hour. Near the end, as the rice is almost done (you'll need to taste it to know), add in the remaining tsp. of rosemary and the remaining tablespoon of butter. Next add in the shredded cheese and stir like mad! The cheese would be the final step - once you add in the cheese, you should remove the risotto from the heat and stir many times to ensure the cheese is evenly distributed and the begins to cool.
Place one half of the mixture into a large bowl and stir each half of the risotto occasionally to speed the cooling process. Allow the mixture to cool completely - about 3-5 hours.
Once completely cooled and congealed, roll about 1 1/2 inch balls and place onto a large baking sheet. Refrigerate the balls for about 3 hours. Fill a very deep fryer (I used my wok) with about 6" of cooking oil and heat over high heat until extremely hot - about 5 minutes before ready. Roll each ball in breadcrumb and working in batches, carefully drop about 6 balls into the fryer at one time. Using a slotted spoon, remove balls after about 30-60 seconds and drain on paper bags. Repeat until all balls are complete.
I made these 1 day before needed and reheated in an oven set at 350 for 15 minutes.
Labels:
Holiday food,
little Bites,
meats,
Party Menu,
pasta,
Recipe
Tuesday, June 1, 2010
Jewish Biscotti: Mandelbreit
My Aunt Miriam was an amazing baker! I'm willing to bet she rivaled her sister-in-law, my grandmother (who was more than likely the better, more precise, baker but had much less "creativity" in her cooking).
Aunt Miriam used to host Passover - long, long, ago and she would make these little "cookies" with and without nuts. In fact, she gave me both recipes when I asked her. I was about 10 or 11 when I asked for the recipe and to be honest, it wasn't until about 6 months ago that I made these for the first time. My mother - another amazing baker - makes them all the time. The first time I made I read the recipe all wrong...I must have been very tired...and as a result, I ran out of almond extract. Fortunately I was able to siphon some away from another source and make them properly.
This past weekend, my mother was overwhelmed with other items for a party and asked me to chip in. I made these as well as my grandmother's Carmel Squares - always a crowd pleaser.
This recipe is worth the effort - and truthfully there isn't much effort required. Lesson: get this recipe right and it will pay dividends!
Mandelbreit
3 eggs
1 cup sugar
1 cup vegetable oil
1 tsp, almond extract
1 tsp. vanilla extract
3 1/2 cup flour
1 cup chocolate chips
1 tsp. baking powder
Mix:
1 tsp. ground cinnamon
1/4 cup sugar
Preheat oven to 325. Lightly spray a cookie sheet with Baker's Joy (non-stick baking spray).
Beat eggs together in a large bowl and add in sugar. Mix until pale and light. Add oil and mix again. Next add in the extracts and mix. Add in the chips followed by the flour and baking powder. With floured hands, form four loaf-like torpedoes width-way on the sheet. Sprinkle each one with enough cinnamon-sugar mixture to coat end to end. Bake for 35 minutes. Remove from oven, slice into 2" pieces, separate each one slightly from the one next to it and place back in the oven. Turn off the heat! Close the door and allow it to toast another 25-30 minutes.
Aunt Miriam used to host Passover - long, long, ago and she would make these little "cookies" with and without nuts. In fact, she gave me both recipes when I asked her. I was about 10 or 11 when I asked for the recipe and to be honest, it wasn't until about 6 months ago that I made these for the first time. My mother - another amazing baker - makes them all the time. The first time I made I read the recipe all wrong...I must have been very tired...and as a result, I ran out of almond extract. Fortunately I was able to siphon some away from another source and make them properly.
This past weekend, my mother was overwhelmed with other items for a party and asked me to chip in. I made these as well as my grandmother's Carmel Squares - always a crowd pleaser.
This recipe is worth the effort - and truthfully there isn't much effort required. Lesson: get this recipe right and it will pay dividends!
Mandelbreit
3 eggs
1 cup sugar
1 cup vegetable oil
1 tsp, almond extract
1 tsp. vanilla extract
3 1/2 cup flour
1 cup chocolate chips
1 tsp. baking powder
Mix:
1 tsp. ground cinnamon
1/4 cup sugar
Preheat oven to 325. Lightly spray a cookie sheet with Baker's Joy (non-stick baking spray).
Beat eggs together in a large bowl and add in sugar. Mix until pale and light. Add oil and mix again. Next add in the extracts and mix. Add in the chips followed by the flour and baking powder. With floured hands, form four loaf-like torpedoes width-way on the sheet. Sprinkle each one with enough cinnamon-sugar mixture to coat end to end. Bake for 35 minutes. Remove from oven, slice into 2" pieces, separate each one slightly from the one next to it and place back in the oven. Turn off the heat! Close the door and allow it to toast another 25-30 minutes.
Labels:
dessert/baked goods,
Party Menu,
Recipe,
Someone Else's Food
Grasshopper Pie: Just what the Heat Ordered!
What's more refreshing than ice cream? How about frozen mint ice cream with white chocolate chips in an Oreo cookie pie crust? Yep, that'll do it!
This is no-cook proof - I swear it. You can make this wowtastic pie and feel like you've really cheated the system. Watch how simple:
Grasshopper Pie
1 ready-made Oreo Cookie 9" pie crust
2 pints Premium vanilla ice cream, softened
2/3 cup white chocolate chips
1 Tbsp. peppermint extract
1/2 tsp. green food coloring
In a mixer, mix the ice cream until it's smooth, about 10-15 seconds. Add in the extract and chips and mix well - about 10 seconds. Add in the coloring and mix until well colored. If you desire a greener look, add more coloring. Pour ice cream into the pie crust, cover and freeze. Best made 1 day before.
Labels:
dessert/baked goods,
Party Menu,
Recipe
Thursday, April 1, 2010
Easter Sunday: Menu
I know that Easter and Christmas are religious holidays but for me there is nothing better than preparing a festive meal - for the mere sake of actually eating it with friends and family you love. You know I'd say that (and have said it) about Passover or Yom Kippur, as well, don't you?
Truth be told, this year has been a tough one for our family and this holiday has sort of crept up on me. Realizing I needed to prepare and plan, I set the menu while waiting for my daughter to finish her dance class. Once home, I tweaked it a bit and the finishing touches won't actually be complete until Sunday, of course. I tried to pit fancy against tried and true so that I could ensure an "easy" time of it. So here is the plan.
* A note about the lamb: I'm making this one up as I go along so I'll be sure to give a full report on the other side of Sunday. For now, I can tell you I've put a great deal of thought into this dish and I am super excited about it, thus far.
A Very-Spring Easter Sunday Menu
Hors D'Ouevres
* Clam Dip http://meredithsfoodforlife.blogspot.com/2009/04/baked-clam-dip-recipe.html
* Assorted Cheeses, Crackers and Fruit
* Kir Royale
First Course
* Fresh Mozzarella, Sliced Tomato and Fresh Basil with Olive Tapenade Olive Tapenade
* Shrimp Cocktail
* Proscuitto wrapped Melon Melon Wrapped with Proscuitto
* Stuffed, Baked, Zucchini Boats
Second Course
Penne alla Vodka http://meredithsfoodforlife.blogspot.com/2008/12/sauces-recipe.html
Salad Course
Field Greens with Red Pear, Walnuts and Gorgonzola with Lime Vinaigrette
Main Course
* Drunken-Roast Lamb Stuffed with Sundried Tomato, Spinach and Feta Cheese Drunken Roast Lamb
* Salad of Cold Petite Peas and Roasted Pepper Cold Peas
* Yukon Gold and Yam Mashed Potatoes
* Sweet Sautéed Carrots with Honey and Thyme Sweet Carrots
Dessert
* Assorted Fruit
* Giant Easter Basket
* Old Fashioned Coconut Cake Coconut Cake
* Red Velvet Cake Red Velvet Cake
* Ice Cream
* Pastry
Truth be told, this year has been a tough one for our family and this holiday has sort of crept up on me. Realizing I needed to prepare and plan, I set the menu while waiting for my daughter to finish her dance class. Once home, I tweaked it a bit and the finishing touches won't actually be complete until Sunday, of course. I tried to pit fancy against tried and true so that I could ensure an "easy" time of it. So here is the plan.
* A note about the lamb: I'm making this one up as I go along so I'll be sure to give a full report on the other side of Sunday. For now, I can tell you I've put a great deal of thought into this dish and I am super excited about it, thus far.
A Very-Spring Easter Sunday Menu
Hors D'Ouevres
* Clam Dip http://meredithsfoodforlife.blogspot.com/2009/04/baked-clam-dip-recipe.html
* Assorted Cheeses, Crackers and Fruit
* Kir Royale
First Course
* Fresh Mozzarella, Sliced Tomato and Fresh Basil with Olive Tapenade Olive Tapenade
* Shrimp Cocktail
* Proscuitto wrapped Melon Melon Wrapped with Proscuitto
* Stuffed, Baked, Zucchini Boats
Second Course
Penne alla Vodka http://meredithsfoodforlife.blogspot.com/2008/12/sauces-recipe.html
Salad Course
Field Greens with Red Pear, Walnuts and Gorgonzola with Lime Vinaigrette
Main Course
* Drunken-Roast Lamb Stuffed with Sundried Tomato, Spinach and Feta Cheese Drunken Roast Lamb
* Salad of Cold Petite Peas and Roasted Pepper Cold Peas
* Yukon Gold and Yam Mashed Potatoes
* Sweet Sautéed Carrots with Honey and Thyme Sweet Carrots
Dessert
* Assorted Fruit
* Giant Easter Basket
* Old Fashioned Coconut Cake Coconut Cake
* Red Velvet Cake Red Velvet Cake
* Ice Cream
* Pastry
Labels:
dessert/baked goods,
Holiday food,
Lamb,
Menu,
Party Menu,
Recipe,
Sides/Salads,
Vegetables
Wednesday, March 31, 2010
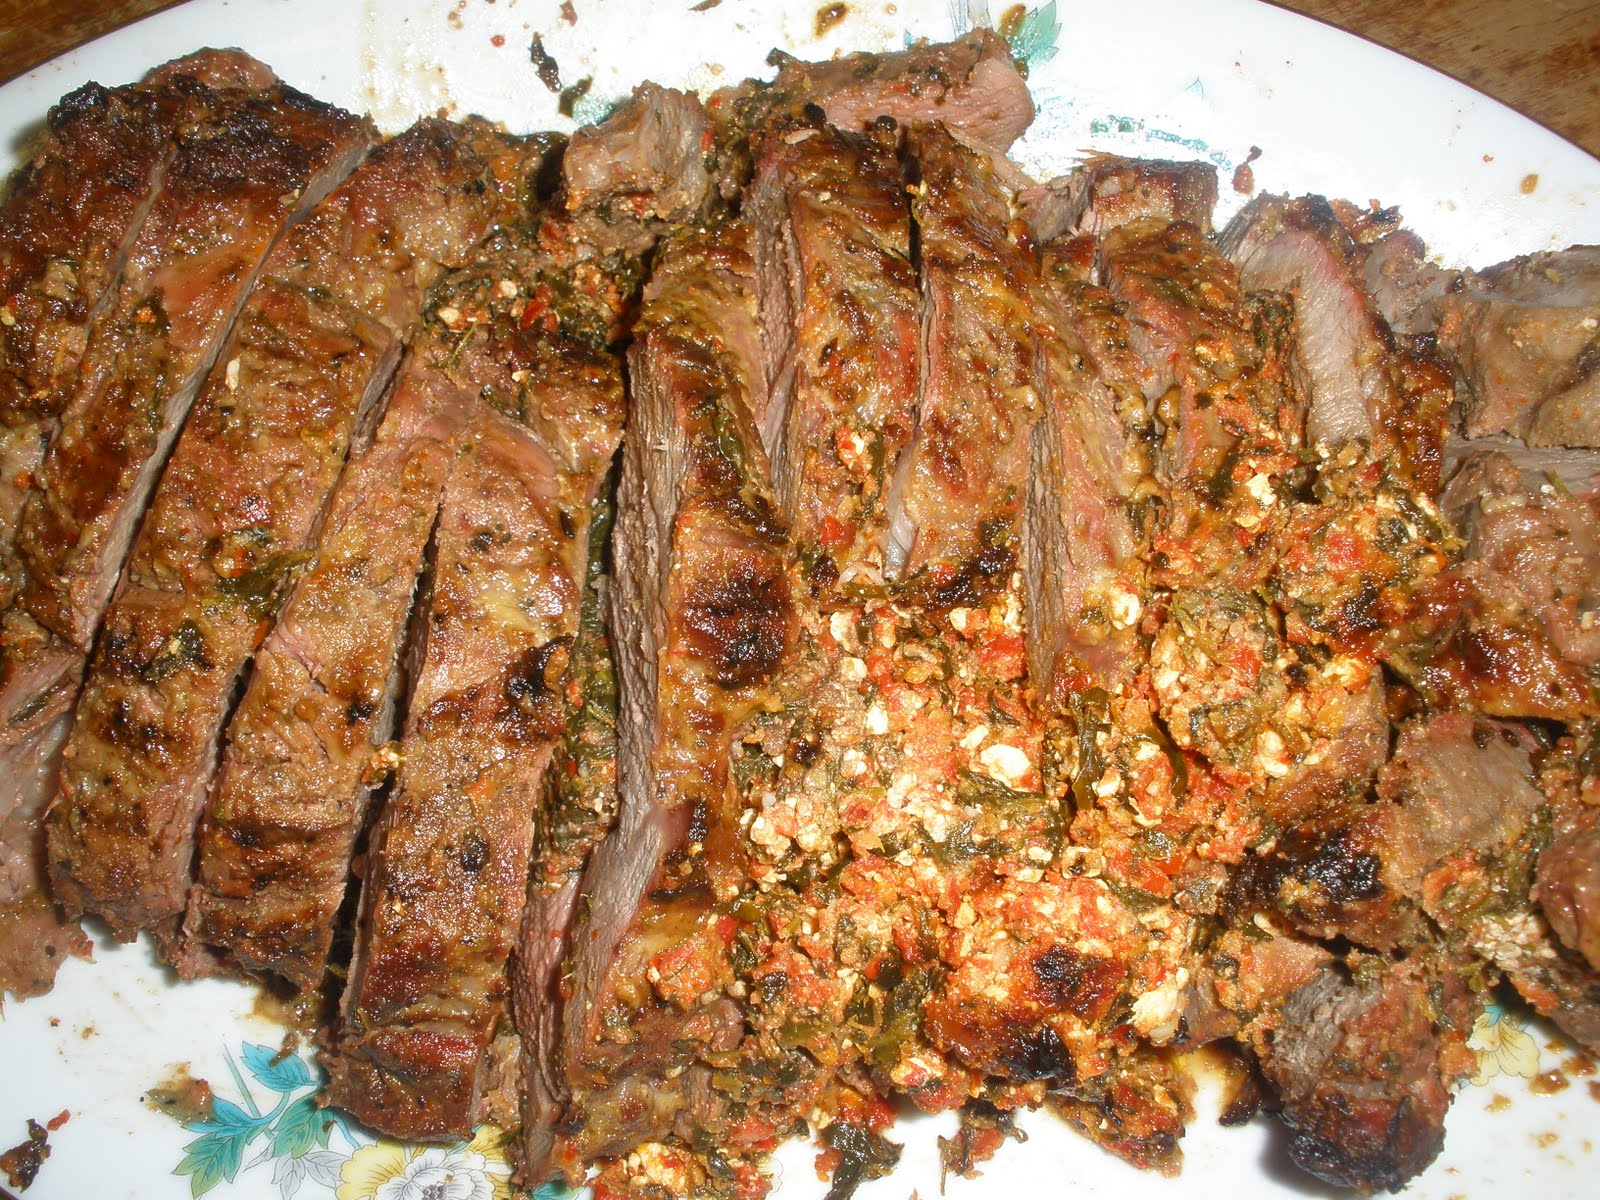
Drunken Lamb: Recipe
Lamb is a natural for Easter, right? Spring, re-birth, renew = a little lamb...yikes! That sounds morbid!
Okay, let's start that again...I love lamb! And Easter seems like a perfect time for it. This year, I wanted to do something I've not done before - a stuffed leg of lamb. I went to the butcher - highly recommended - and I asked the man for a butterflied leg of lamb. I told him I was having 13 people and told him I'd like to please keep the bones. (I have NO CLUE what to do with them but I'm sure I'll figure out something!)
What is butterflied, exactly? Well, it's simple, really. If you take a whole leg of lamb and slice it along the top with a very sharp knife and remove the bones and slice it a bit deeper, you can then open up the piece of meat - almost like a book - and it will resemble a butterfly. Preparing the meat this way will reduce cooking time, if grilled, and it will allow a marinade to penetrate the meat, more so than if you had the entire leg in tact. Quite frankly, holding up this giant piece of meat it occured to me that it looked like a pair of pants! It was funny, really.
The night before I was ready to serve this, I made the stuffing and put the whole thing together. Thank the Lord for my husband - I should really say that he put the whole thing together! And it was a comedy routine between the two of us. I would urge you to ask for some help - folding and trussing a piece of meat this large by yourself if bound to be both frustrating and more frustrating.
So...WOW! This was a huge hit and it was delicious. I was really pleased. I think it would have been good if I had made it in the oven but the fact that I we made it on the barbecue and that my husband did as great a job on it as he did made this all the more incredible. I've added some "notes" below for your information.
Drunken Roast Leg of Lamb Stuffed with Sundried Tomatoes, Spinach and Feta
11 lbs. butterflied leg of lamb (no bone)
5 heaping Tbls. Dijon Mustard
1 cup Sauvignon Blanc - from New Zealand
2/3 cup olive oil
10 garlic cloves
1 tsp. fresh thyme
1 Tbsp. dried oregano
1 Tbsp. Kosher Salt
In a food processor, combine the mustard, oil, garlic, thyme, oregano and salt. Mix well - until all the garlic is completely minced. Into the shoot, pour the wine and continue to mix it in while motor is running.
Place the meat into a large throw-away roasting tin and lightly score the meat all over. Pour mixture over the meat and using a spoon and a fork, ensure all meat is well covered. Cover pan with foil and refrigerate for 3 nights.
Stuffing
1 very packed cup sundried tomatoes (not in oil)
1 10-oz. pkg. chopped, frozen, spinach - thawed and squeezed of any excess water
8 garlic cloves
1/4 cup olive oil
6 oz. crumbled feta cheese
In a food processor, combine the tomatoes, oil, and garlic until a smooth paste is formed. Combine it with the cheese and spinach in a large mixing bowl. Mix well.
Assembly
* Remove the lamb from the refrigerator and with a pastry brush, clear away a good amount of the marinade from the meat - do not discard
* Place the meat - bone side up - on a clean work surface (I placed it onto the foil that was used to cover the meat) with the two "pant legs" closest to you
* Overlap the two "pant legs" slightly so the entire piece looks like a rectangle
* Spoon the stuffing mixture onto the lamb - leaving a two inch border around the outside
* Cut yourself a very, very long piece of trussing string
* Fold and roll one long side of the meat toward the center at a time - both sides will be folded in toward each other, trying to keep the stuffing inside
* VERY tightly, tie a knot around the very end of one side and repeat with a second piece of string on the other side
* Next take the long string and tie knots every 2 inches - working your way from one end to the other and securing all the way
* Reserve the marinade and place into a bowl - cover and refrigerate
* Place the meat back into the tin tray and recover and refrigerate overnight
Cooking
* Set up the grill by placing an 8 or 9 inch tin pan in the center of the bottom of the grill. Spread the charcoal around the pan - in a circle and allow the fire to get super hot - we planned to put the meat on the grill at 2 p.m. and we started the grill at 1:15 p.m.
* Bring the meat to room temperature before cooking - to reduce cooking time and to allow the meat to get a crisp outside before continuing to cook over indirect heat. I left it out for 2 hours - in the same tin foil tray it was in and with the cover on it.
* Sear the meat: place it on the grill for 20 minutes - about 10 minutes each side. Do not cover the grill but rather leave it open to ensure a crisp outside.
* Baste the meat regularly - about 15-20 minutes - with the left over marinade. Each time you baste, turn the meat over to ensure even cooking and no burning or charring
* Be sure to add a few more coals to the grill as needed - over the course of about 2 hours we added coals about 3 times
* Cook the meat - (if using this many pounds) about 1 hour 40 minutes and allow it to rest on your serving platter, covered lightly with foil, for another 20 minutes before slicing
* Slice the meat on the serving platter it's already on - don't think you can move the meat with the stuffing...you can't!
Labels:
Holiday food,
Lamb,
Party Menu,
Recipe,
Spotlight of the Week
Sunday, March 7, 2010
Dim Sum for Dinner: Recipe
My family loves dumplings. At this stage we might all turn into a dumpling after the amount we eat! But we love them - Japanese style Gyoza or Shumai or Chinese style steamed or fried. In fact, I love all dumplings and truthfully it seems that all nationalities have a version: Jews have Kreplach, Indians have Samosas, Italians have Ravioli! Ultimately it's the same concept and likely they all started the same way: a cook with left over meat and/or fish needed a way to ensure no waste...and voila! Why not stuff it inside of something!
We had steamed and fried dumplings last night for dinner. I have a large bamboo steamer. Here are two versions: pork steamed and shrimp fried.
You can serve these as dinner or as an hors d'oeuvre. They can be made well in advance and frozen and then dropped into the steamer basket.
If you don't have a bamboo steamer, don't fret! You can place the dumplings on an elevated heat proof plate on top of a bowl on the bottom of a large pot. Fill the bowl with water, place the plate on top of the bowl, cover and steam.
Steamed Dumplings
3/4 lb. ground pork
1 Tbsp. soy sauce
1 Tbsp. olive oil
4 large napa cabbage leaves + extra leaves for the steamer basket
2 scallions, minced
4 shiitake mushrooms, minced
1 garlic clove, minced
1 Tbsp. minced fresh ginger
1 large leek, minced
1 Tbsp. rice vinegar
1 Tsp. sesame oil
1 large carrot, shredded
pepper
25-30 square wanton wrappers
Slice the stem ends off the cabbage and mince the remaining parts. Squeeze out any excess water and add to a large bowl. Add all remaining ingredients. Mix well.
Line a cookie sheet with waxed paper and set aside.
On a dry work surface, spread out as many wrappers as possible in a diamond shape. Add a small amount of filling to the center of each one. Fill a small bowl with water and with your index finger, lightly wet the four sides of each wrapper. Fold the top corner to the bottom, forming a triangle. press the sides together to seal the filling inside. Next fold each side in toward the middle. Place on the prepared sheet and repeat until all wrappers are finished.
If there is left over filling, you can refrigerate it for up to 2 days or you can freeze it up to a week.
Next, line the steamer with cabbage leaves. Place the steamer basket in a large pot -like a wok - and fill the wok with water stopping just under the bottom of the basket. Do not allow water to come into the basket. Place the dumplings on top of the cabbage leaves (and repeat if you have two basket trays) and cover. Turn on the heat on high for about 12-15 minutes.
Be VERY careful opening the steamer basket - steam can burn.
Fried Shrimp Dumplings
3/4 lb. large shrimp, shelled and deveined
2 large scallions
1 Tbsp. fresh minced ginger
1 large carrot, shredded
2 Tbsp. water chestnuts, minced
1 garlic clove, minced
1 Tbsp. Olive Oil
1 Tbsp. Soy Sauce
1 tsp. spicy mustard
1 tsp. sesame oil
In a food processor, pulse the shrimp several times until completely minced. Place in a large mixing bowl and add all other ingredients. Mix well.
Line a cookie sheet with waxed paper and set aside.
On a dry work surface, spread out as many wrappers as possible in a diamond shape. Add a small amount of filling to the center of each one. Fill a small bowl with water and with your index finger, lightly wet the four sides of each wrapper. Fold the top corner to the bottom, forming a triangle. press the sides together to seal the filling inside. Next fold each side in toward the middle. Place on the prepared sheet and repeat until all wrappers are finished.
If there is left over filling, you can refrigerate it for up to 2 days or you can freeze it up to a week.
In a large frying pan, heat 2-3 Tbsp. olive oil. Fry dumplings (in batches so you don't overcrowd the pan), seam sides down, about 3 minutes per side. Drain on paper towels and serve.
Labels:
fish/seafood,
little Bites,
meats,
Party Menu,
pork,
Recipe
Thursday, August 27, 2009
When a Working Mom Stays Home: Musings on Food and Family
pizza with garlic-soaked fresh tomatoes, fresh basil, fresh sliced mushrooms, air-cured bresoala, sliced artichokes, and kalamata olive halves
Ahh, the debate: should moms work or stay-at-home. I'm not a child psychologist so I have no idea what is better for children and I haven't a clue what the research bears out but I do know that as a working mom I leave each day with a very heavy heart and return with butterflies of excitement just as often. Can there be a right answer? Certainly I think there is a right answer for each person and her family but an overall one-is-better-than-the-other right answer? Not so sure.
Why do I bring this up on my food blog? Well, it's simple. On days I stay home from work, I find myself overcompensating for the fact that we can't do "fun" things all throughout the week. So I try to deliver tons of thrills all at once. By the looks I get, I think it works. When they're old enough to figure out what I'm doing, either they will ignore my wild attempts or I won't be working anymore!
In anticipation of being home today, I promised we would make our own pizza and tonight we kept our promise. I rolled out three pizza pies - one for each child and one for my husband and I to share. I cut up toppings of all sorts and let the kids make their own. They loved making them more than they loved eating them! But it was great fun and now we're all stuffed.
The pizza dough was from Trader Joe's (remember, I am a working parent so I know the value of time management and making dough from scratch for this purpose would have wasted our day together). It was great fun and if you have kids, I encourage this whether or not you work.
Labels:
food musings,
Party Menu,
Spotlight of the Week
Subscribe to:
Posts (Atom)